Craftsman Garage Door Opener Light Blinks But Remote Not Working: Causes & Fixes

Craftsman Garage Door Opener Light Blinks But Remote Not Working

A Craftsman garage door opener is a convenient tool for seamless home access, but when issues arise, it can be frustrating. One of the most common problems homeowners face is when the garage door opener light blinks, but the remote does not work.

Craftsman Garage Door Opener Light Blinks But Remote Not Working

So, why is your Craftsman garage door opener light blinking, but the remote is not working? This issue could be due to battery problems, signal interference, misalignment, or a need for reprogramming. Understanding the potential causes and solutions can help restore your garage door’s functionality.

In this guide, we’ll explain the possible reasons why your Craftsman garage door opener light blinks but the remote is not working, along with step-by-step troubleshooting solutions.


Why Is My Craftsman Garage Door Opener Light Blinking?

The blinking garage door opener light serves as an indicator of a problem. Depending on the number of flashes, it can point to various issues, such as:

  • Remote control failure
  • Sensor misalignment
  • Battery or wiring issues
  • Interference from nearby devices
  • The opener needs to be reset or reprogrammed

If your garage door opener light blinks but the remote does not work, follow the troubleshooting steps below to diagnose and fix the issue.


Craftsman Garage Door Opener Light Blinks But Remote Not Working: Common Causes & Fixes

1. Check the Remote Control Batteries

One of the simplest reasons your Craftsman garage door opener remote is not working is a dead or weak battery.

👉 How to Fix:

  • Open the battery compartment of the remote and replace the battery (usually a CR2032 or A23 battery).
  • Ensure the battery is inserted correctly with the proper polarity (+/-).
  • Test the remote again after replacing the battery.

💡 Tip: If you have multiple remotes and only one is not working, a battery replacement is the most likely solution.


2. Reprogram the Garage Door Remote

If your remote lost its programming, it will no longer send signals to the opener, even though the light blinks.

👉 How to Fix:

  1. Locate the “Learn” button on the Craftsman garage door opener unit.
  2. Press and hold the “Learn” button until the LED indicator light turns on.
  3. Within 30 seconds, press and hold the button on the remote that you want to program.
  4. Wait for the garage opener light to blink, indicating successful programming.
  5. Test the remote to see if it now operates the door.

💡 Tip: If the remote still does not work, try clearing all codes and reprogramming all remotes from scratch.


3. Check for Signal Interference

Wireless interference from Wi-Fi routers, LED lights, or other electronic devices can block the remote’s signal.

👉 How to Fix:

  • Move any wireless devices or electronics away from the garage door opener.
  • Try using the remote closer to the opener unit to check for signal strength.
  • If you have multiple garage door openers, ensure they are not set to the same frequency.

💡 Tip: Some LED light bulbs in garage door openers cause interference. Try switching to garage door-compatible LED bulbs.


4. Inspect the Garage Door Safety Sensors

If the garage door opener light blinks multiple times, it might indicate a problem with the safety sensors.

👉 How to Fix:

  1. Locate the two photo-eye safety sensors near the bottom of the garage door tracks.
  2. Ensure both sensors are facing each other directly.
  3. Check for dust, dirt, or obstructions blocking the sensor’s infrared beam.
  4. If the sensors are misaligned, adjust them until the indicator lights turn solid.

💡 Tip: If the safety sensor wiring is damaged, you may need to replace or reconnect the wires.


5. Reset the Garage Door Opener

If your Craftsman garage door opener light blinks but the remote does not work, resetting the system may help.

👉 How to Fix:

  1. Unplug the garage door opener from the power outlet.
  2. Wait for 30–60 seconds.
  3. Plug the opener back in and test the remote.

💡 Tip: A reset can clear minor software glitches that may be causing the issue.


6. Test the Wall-Mounted Garage Door Button

If the wall button works but the remote doesn’t, the issue is likely with the remote itself.

👉 How to Fix:

  • Try pressing the wall button to check if the door operates correctly.
  • If the wall button works but the remote doesn’t, try replacing the remote battery or reprogramming the remote.
  • If the wall button does NOT work either, there may be an issue with the power supply or circuit board.

💡 Tip: If both the wall button and the remote fail, check the power supply to the opener.


7. Replace the Remote If Necessary

If you’ve tried all the above steps and the remote still does not work, you may need a replacement remote.

👉 How to Fix:

  • Purchase a Craftsman-compatible garage door opener remote.
  • Program the new remote using the “Learn” button method.
  • Test the new remote to ensure it operates properly.

💡 Tip: If a new remote still doesn’t work, the problem may be with the opener’s receiver rather than the remote itself.


When to Call a Professional Garage Door Technician

If you have tried all troubleshooting steps and your Craftsman garage door opener light still blinks but the remote is not working, it may be time to call a professional technician.

You should seek help if:
✔ The opener’s main unit is unresponsive to all remotes and buttons.
✔ The opener’s circuit board is malfunctioning.
✔ The wiring inside the motor unit appears burned or damaged.
✔ The garage door fails to open or close properly, even with the wall button.

A garage door professional can diagnose and repair deeper electrical or mechanical issues.


Preventative Maintenance for Your Craftsman Garage Door Opener

To prevent future remote issues, follow these maintenance tips:

Replace remote batteries annually to ensure strong signal transmission.
Keep the garage door opener unit clean and free of dust buildup.
Check and align safety sensors regularly.
Test the remote and reprogram it if necessary every few months.
Avoid placing Wi-Fi routers near the garage door opener to minimize interference.

By keeping your garage door opener in good condition, you can avoid frustrating remote control failures.


Final Thoughts: Resolving Craftsman Garage Door Opener Light Blinking Issues

If your Craftsman garage door opener light blinks but the remote is not working, the issue is likely caused by:
Dead remote batteries
Signal interference
Misaligned safety sensors
Remote programming issues
Opener system glitches

By following this step-by-step troubleshooting guide, you can diagnose and fix the problem quickly. If the issue persists, consider replacing the remote or seeking professional repair services.

A functioning garage door remote ensures smooth daily operation and security, so don’t delay in fixing the issue!

Craftsman Garage Door Opener Learn Light Flashes Yellow 4 Times: What It Means and How to Fix It

Craftsman Garage Door Opener Learn Light Flashes Yellow 4 Times

A Craftsman garage door opener is a reliable tool that makes accessing your garage effortless. However, like any mechanical device, it can encounter issues that may prevent it from working correctly. One common problem homeowners face is when the “Learn” light flashes yellow four times.

Craftsman Garage Door Opener Learn Light Flashes Yellow 4 Times

So, what does it mean when the Craftsman garage door opener learn light flashes yellow 4 times? This flashing light is an error code that indicates a specific issue with your garage door opener. Understanding what it means and how to troubleshoot it can help you get your system back in working order quickly.

In this guide, we will explain the possible causes of the yellow light flashing four times, how to diagnose the issue, and the steps you can take to fix it.

Read tooo: Craftsman Garage Door Opener 1/2 HP Programming for Effortless Setup


Understanding the Craftsman Garage Door Opener “Learn” Light

The “Learn” button on a Craftsman garage door opener plays a crucial role in programming and troubleshooting. It is used to:

  • Program new remotes and keypads
  • Reset the opener system
  • Identify error codes through flashing patterns

When the yellow “Learn” light flashes four times, it typically indicates an issue with the safety sensors or wiring. The garage door opener uses a self-diagnostic system that displays different blinking patterns depending on the problem.


Craftsman Garage Door Opener Learn Light Flashes Yellow 4 Times: What It Means

If your Craftsman garage door opener’s “Learn” light blinks yellow four times, it usually means there is a problem with the safety sensors or sensor wiring. The safety sensors (also called photo-eye sensors) are responsible for detecting objects in the garage door’s path and preventing it from closing if something is detected.

Possible Causes of the Four Yellow Flashes

Here are some common reasons why your Craftsman garage door opener’s Learn light is flashing yellow four times:

  1. Misaligned Safety Sensors – The safety sensors may be out of alignment, causing the opener to think there is an obstruction.
  2. Obstructed Sensor Path – Dust, dirt, or physical objects could be blocking the infrared beam.
  3. Loose or Damaged Wiring – Faulty wiring between the sensors and the opener can prevent proper communication.
  4. Dirty or Faulty Sensor Lenses – Dirt or damage to the sensor lenses can interfere with proper function.
  5. Defective Safety Sensors – If the sensors are faulty, they may need replacement.

How to Fix a Craftsman Garage Door Opener When the Learn Light Flashes Yellow 4 Times

Now that we know what the error means, let’s go through a step-by-step troubleshooting process to resolve it.

1. Check for Obstructions in the Sensor Path

First, inspect the garage door’s sensor area for any objects blocking the sensors. Common obstructions include:
✔ Boxes or tools near the door tracks
✔ Spider webs, dirt, or dust buildup
✔ Snow or leaves blocking the sensor

👉 Fix: Remove any obstructions and clean the sensor lenses with a soft, dry cloth.

2. Align the Safety Sensors Properly

The photo-eye sensors on both sides of the garage door must be aligned correctly to function properly. If they are out of alignment, the opener will not operate.

👉 Fix:

  1. Locate the two safety sensors (one on each side of the garage door).
  2. Adjust them so they are facing each other directly.
  3. Look for the indicator lights—both should be solid, not blinking.

💡 Tip: Many Craftsman models have green and yellow sensor lights. A solid green light usually means the sensors are aligned properly.

3. Inspect and Secure Sensor Wiring

Faulty or loose wiring can also cause the learn light to blink yellow four times.

👉 Fix:

  1. Check the wires connected to each safety sensor and make sure they are securely attached.
  2. Look for any visible damage, fraying, or loose connections.
  3. If the wires appear damaged, you may need to replace them or tighten the connections.

4. Reset the Garage Door Opener

Sometimes, a simple reset can clear the issue and get your garage door opener working again.

👉 Fix:

  1. Unplug the opener from the power outlet.
  2. Wait 30–60 seconds before plugging it back in.
  3. Test the system to see if the issue persists.

5. Test the Garage Door Opener with a Remote

If your Craftsman garage door opener learn light still flashes yellow four times, try using the remote to close the door manually.

👉 Fix:

  • Press and hold the wall button or remote control button to override the sensor system.
  • If the door closes, this confirms that the issue is sensor-related.

6. Replace Faulty Safety Sensors

If none of the above steps work, the safety sensors may be defective and require replacement.

👉 Fix:

  • Purchase replacement safety sensors that match your Craftsman garage door opener model.
  • Follow the manufacturer’s installation instructions to install the new sensors.

When to Call a Professional for Help

If you have tried all troubleshooting steps and the yellow learn light still blinks four times, it may be time to call a garage door repair professional.

You should seek professional assistance if:
❌ The wiring appears severely damaged or burned.
❌ The opener motor makes unusual noises or fails to respond.
❌ You have replaced the sensors, but the problem persists.

A technician can diagnose deeper electrical or mechanical issues that may be causing the problem.


Preventative Maintenance Tips for Craftsman Garage Door Openers

To avoid future issues with your garage door opener, follow these maintenance tips:

Keep the sensors clean – Wipe them down regularly with a soft cloth.
Check alignment monthly – Ensure the sensors are properly positioned.
Inspect wiring periodically – Look for signs of wear or damage.
Lubricate moving parts – Keep the garage door mechanism running smoothly.

By maintaining your Craftsman garage door opener, you can reduce the risk of sensor-related issues and keep your system functioning properly.


Final Thoughts: Understanding the Yellow Flashing Light on Your Craftsman Garage Door Opener

So, why does the Craftsman garage door opener learn light flash yellow 4 times? The most likely cause is a problem with the safety sensors or their wiring.

By following the troubleshooting steps outlined above, you can identify and fix the issue, ensuring your garage door opener works smoothly again.

If you are unable to resolve the problem on your own, contact a professional for assistance. A well-functioning garage door opener is essential for security and convenience, so don’t ignore persistent issues!

Troubleshooting the Honda Electric Parking Brake Problem: Car Won’t Start

Honda Electric Parking Brake Problem Car Won'T Start

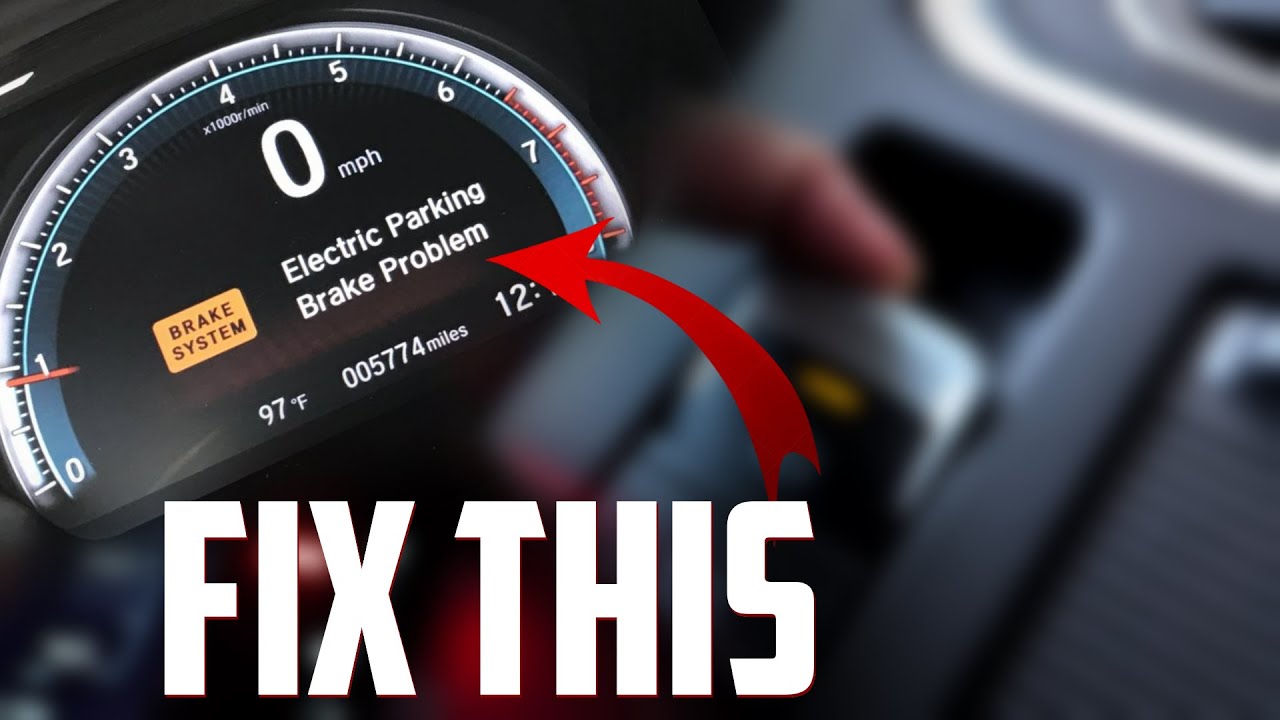
Are you facing the frustrating issue of your Honda’s car not starting due to an electric parking brake problem? You’re not alone! In this comprehensive guide, we will delve into the Honda Electric Parking Brake Problem Car Won’t Start issue, its causes, and the steps you can take to resolve it. We understand how crucial it is to have your vehicle in top working condition, and that’s why we’re here to help you get back on the road without any worries.

Understanding the Honda Electric Parking Brake Problem Car Won’t Start

To address the Honda Electric Parking Brake Problem Car Won’t Start, it’s essential to understand the problem thoroughly. The electric parking brake is an integral part of your vehicle’s safety and convenience features. It’s designed to securely hold your vehicle in place when parked, preventing it from rolling away. However, when this system encounters issues, it can lead to your car refusing to start.

Common Symptoms of the Honda Electric Parking Brake Problem

Before we discuss the causes and solutions, let’s take a look at the common symptoms that indicate you might be dealing with the Honda Electric Parking Brake Problem Car Won’t Start:

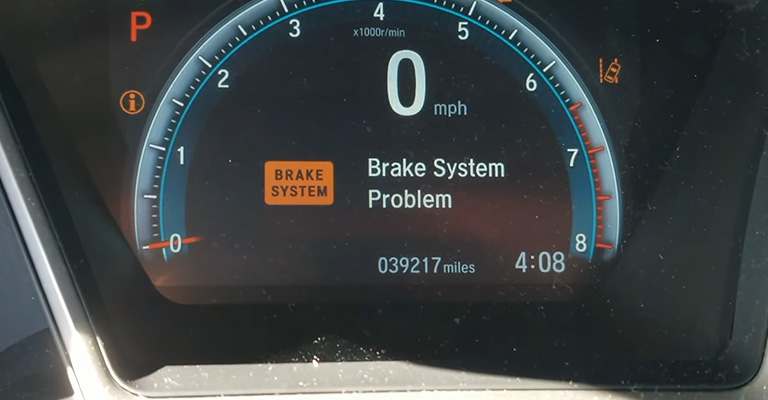
  1. Dashboard Warning Lights: You may notice warning lights related to the electric parking brake system, such as an amber “EPB” or “Brake” light.
  2. Unresponsive Ignition: When you attempt to start your Honda, the ignition may be unresponsive, and the engine won’t turn over.
  3. Unusual Sounds: You might hear unusual clicking or grinding noises when trying to start the car.
  4. Stuck Gear Shift: The gear shift may become stuck in the “Park” position, making it impossible to move to “Drive.”

Causes of the Honda Electric Parking Brake Problem Car Won’t Start

Now, let’s explore the potential causes of this issue:

  1. Faulty Electric Parking Brake Module: The electric parking brake module can malfunction, preventing the system from disengaging properly.
  2. Low Battery Voltage: Insufficient battery voltage can affect the system’s ability to disengage the parking brake, leading to starting problems.
  3. Sensor Issues: Sensors related to the electric parking brake system may fail or become dirty, leading to incorrect readings and brake engagement.
  4. Wiring Problems: Damaged or corroded wiring can disrupt communication between the electric parking brake system components.

Troubleshooting and Solutions

To resolve the Honda Electric Parking Brake Problem Car Won’t Start, follow these steps:

  1. Check the Battery: Ensure your car’s battery is in good condition. Weak or dead batteries can trigger starting problems.
  2. Reset the Parking Brake: Try resetting the electric parking brake by following your vehicle’s user manual. This may involve cycling the brake on and off or using a reset procedure.
  3. Inspect Sensors: Carefully inspect the sensors associated with the electric parking brake system. Clean them if necessary and check for loose connections.
  4. Diagnose Module Issues: If the problem persists, you may need to diagnose the electric parking brake module for faults. Seek professional help if needed.
  5. Examine Wiring: Have a mechanic examine the wiring related to the electric parking brake system. Repair or replace any damaged or corroded wires.
  6. Professional Assistance: If you’re unable to identify or resolve the issue, it’s recommended to consult a certified Honda technician or a qualified mechanic who can diagnose and repair the problem accurately.

Read Too:

Preventing Future Issues

To avoid facing the Honda Electric Parking Brake Problem Car Won’t Start in the future, consider these preventive measures:

  1. Regular Maintenance: Follow Honda’s recommended maintenance schedule to keep all vehicle systems in top working condition.
  2. Battery Health: Periodically check your battery’s health and replace it if it’s old or unreliable.
  3. Keep Sensors Clean: Ensure that sensors related to the electric parking brake system stay clean and free from debris.
  4. Safe Parking: Always engage the parking brake properly when parking your vehicle to reduce wear and tear on the system.

In conclusion, the Honda Electric Parking Brake Problem Car Won’t Start can be a frustrating issue, but with the right knowledge and steps, you can diagnose and resolve it. Regular maintenance and vigilant care can help prevent future occurrences of this problem. If you encounter persistent issues, don’t hesitate to seek professional assistance to ensure your vehicle’s safety and reliability.

Solving the Honda Civic Electric Parking Brake Problem: Why Your Car Won’t Start

Honda Civic Electric Parking Brake Problem Car Won'T Start

The Honda Civic has long been a reliable and popular choice for drivers around the world. However, like any other car, it can face issues that leave you scratching your head. One of these problems that can be particularly frustrating is the “Honda Civic Electric Parking Brake Problem Car Won’t Start.” In this article, we will delve into the details of this issue and provide you with valuable insights on how to resolve it.

Understanding the Honda Civic Electric Parking Brake Problem Car Won’t Start

What is the Honda Civic Electric Parking Brake Problem?

The Honda Civic Electric Parking Brake Problem can manifest itself in various ways, but one of the most frustrating scenarios is when your car simply won’t start. This issue can leave you feeling helpless and stranded, but understanding the root causes and potential solutions is crucial.

Common Symptoms of the Problem

Before we dive into the solutions, it’s essential to recognize the common symptoms associated with the “Honda Civic Electric Parking Brake Problem Car Won’t Start.” These include:

  1. Unresponsive Start Button: When you press the start button, nothing happens, and the car remains idle.
  2. Warning Lights: The dashboard may display warning lights related to the electric parking brake, ABS, or other systems.
  3. Strange Noises: You might hear unusual sounds when attempting to start the car, indicating a potential issue with the electric parking brake.
  4. Brake Engaged Indicator: The brake engaged indicator may remain lit, even when you believe the brake is disengaged.

Causes of the Problem

Now that we’ve identified the symptoms, let’s explore the possible causes of the “Honda Civic Electric Parking Brake Problem Car Won’t Start.”

  1. Faulty Electric Parking Brake Actuator: One of the leading causes is a malfunctioning electric parking brake actuator. This component is responsible for engaging and disengaging the parking brake, and if it fails, it can prevent the car from starting.
  2. Low Battery Voltage: A weak or dead battery can also trigger this problem, as the car may not have enough power to initiate the start-up process.
  3. Software Glitches: Like all modern vehicles, the Honda Civic relies on software for various functions. Sometimes, software glitches can interfere with the electric parking brake system, leading to starting issues.
  4. Faulty Brake Sensors: The electric parking brake system relies on sensors to detect whether the brake is engaged. If these sensors malfunction, it can lead to a car that won’t start.

Solving the Honda Civic Electric Parking Brake Problem Car Won’t Start

Now that we’ve identified the causes, let’s discuss potential solutions to get your Honda Civic back on the road.

1. Battery Check

The first step is to ensure your car’s battery is in good condition. You can either test the battery yourself or have it checked by a professional. If the battery is weak or dead, replacing it may resolve the issue.

2. Manual Override

Some Honda Civic models come with a manual override option for the electric parking brake. Refer to your owner’s manual to see if your car has this feature and how to use it to release the parking brake.

3. Reset the Parking Brake

Resetting the parking brake can sometimes resolve the problem. Follow these steps:

a. Turn off the ignition.

b. Locate the parking brake switch.

c. Press and hold the switch while turning on the ignition.

d. Release the switch when you hear a series of beeps.

4. Check for Software Updates

If you suspect a software glitch, contact your local Honda dealership to inquire about any available software updates for your vehicle. These updates can often fix software-related issues.

Read Too : Is It Safe To Charge Electric Car In Garage

5. Consult a Professional

If none of the above solutions work, it’s advisable to seek professional help. A certified Honda technician can diagnose the problem accurately and recommend the best course of action.

Conclusion

The “Honda Civic Electric Parking Brake Problem Car Won’t Start” can be a frustrating issue, but with the right knowledge and troubleshooting, you can overcome it. Always ensure your car’s maintenance is up to date, and don’t hesitate to seek professional help when needed. By following the steps outlined in this article, you can increase the chances of getting your Honda Civic back on the road.