Craftsman Garage Door Opener Remote How To Replace Battery: A Comprehensive Guide

Craftsman Garage Door Opener Remote How To Replace Battery

Maintaining a Craftsman Garage Door Opener Remote is essential for smooth operation and convenience. One of the most common issues you may encounter with this remote is a dead or malfunctioning battery. In this detailed guide, we will explain how to replace the battery in your Craftsman Garage Door Opener Remote and provide helpful tips for troubleshooting and maintaining your remote to ensure it works optimally.

Craftsman Garage Door Opener Remote How To Replace Battery

Why Does the Battery Need to Be Replaced?

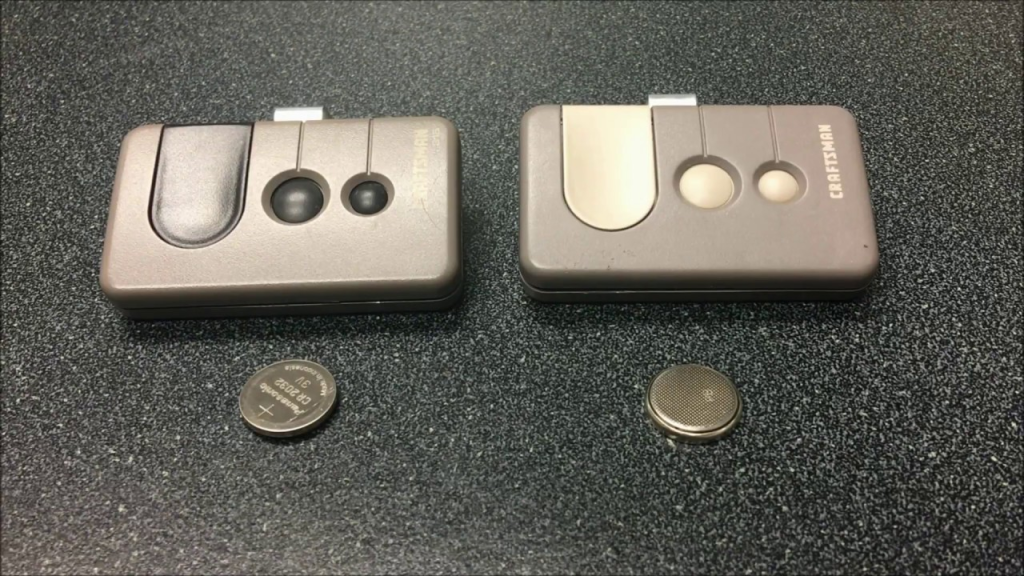
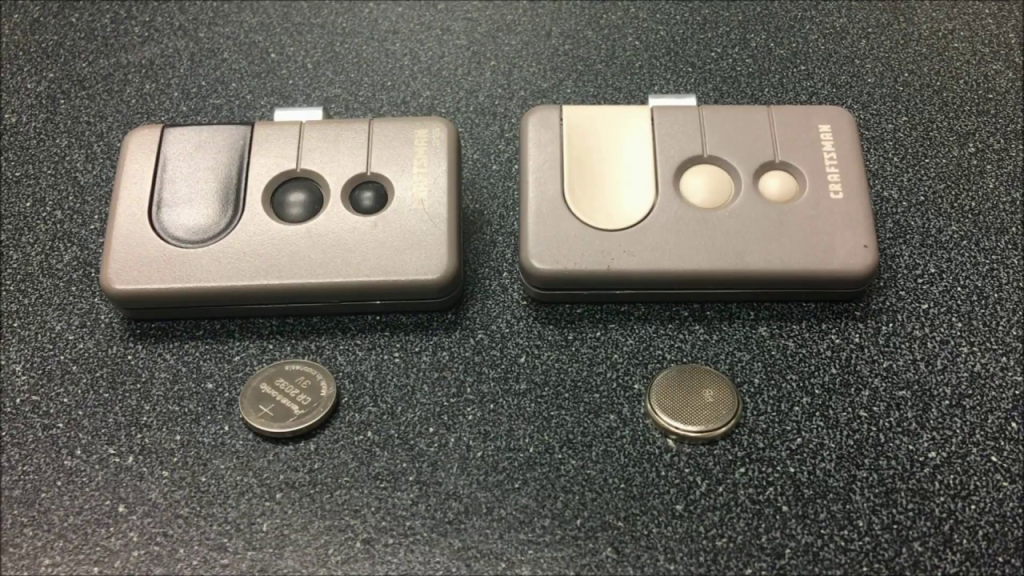
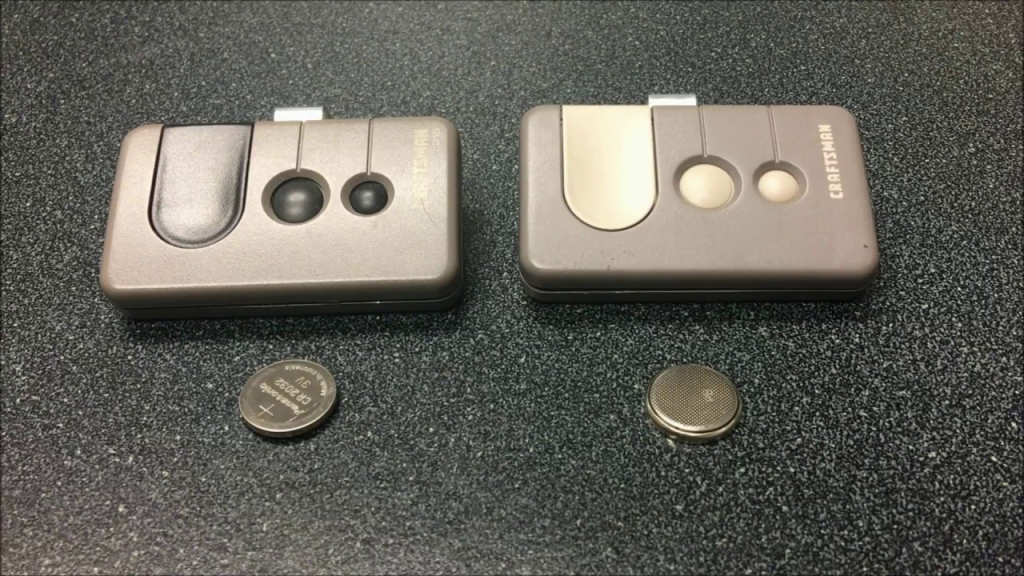
The Craftsman Garage Door Opener Remote is powered by a small battery, usually a 3V coin cell, which powers the internal components of the remote. Over time, as the battery drains, the performance of the remote decreases, and eventually, it may stop working altogether.

Here are some signs that the battery in your Craftsman Garage Door Opener Remote needs to be replaced:

  • The remote doesn’t respond when you press the buttons.
  • The range of the remote has significantly decreased.
  • You hear the motor of the garage door opener trying to engage but it doesn’t respond.

Replacing the battery is a quick fix for these common issues and will restore the functionality of your remote.


Tools You’ll Need to Replace the Battery

Before you begin replacing the battery, it’s a good idea to gather the necessary tools:

  • Flathead screwdriver or coin (if your remote has a screw or needs prying open)
  • New 3V battery (most Craftsman remotes use CR2032 or CR2025 batteries, but you should check your remote’s manual or existing battery to confirm)
  • Soft cloth (to clean the battery compartment)

Read tooo: Craftsman Garage Door Opener 1/2 HP Programming for Effortless Setup


Step-by-Step Guide: How to Replace the Battery in Your Craftsman Garage Door Opener Remote

Now that you have your tools ready, follow these steps to replace the battery in your Craftsman Garage Door Opener Remote.

Step 1: Locate the Battery Compartment

Start by finding the battery compartment on your Craftsman remote. Depending on the model, the compartment can be located either on the back or front of the remote. Some models may have a small screw holding the cover in place, while others might simply snap open with a gentle pry.

  • For remotes with screws: Use a small flathead screwdriver to unscrew and open the back panel.
  • For snap-on covers: Gently use a flathead screwdriver or a coin to pop open the cover.

Step 2: Remove the Old Battery

Once the battery compartment is open, carefully remove the old battery. Take note of how the battery is positioned. The battery will usually have a flat side and a side with a button. Make sure you replace the new battery in the same orientation.

  • Use your fingers or a non-metallic tool to avoid damaging the remote while removing the battery.
  • If the battery is stuck, lightly tap the remote to dislodge it.

Step 3: Insert the New Battery

Now, take your new 3V battery and carefully insert it into the compartment. Ensure that the battery is placed in the same orientation as the previous one. The positive (+) side typically faces up, but this may vary depending on the model.

  • CR2032 or CR2025 batteries are commonly used, but always verify the exact type in your owner’s manual.

Step 4: Close the Battery Compartment

Once the new battery is in place, securely close the battery compartment. If your remote has screws, tighten them back into place. If it uses a snap-on cover, press it firmly until it clicks into position.

  • Ensure the compartment is closed tightly to prevent dirt or moisture from entering.

Step 5: Test the Remote

After replacing the battery and securing the compartment, test your remote to ensure it’s functioning correctly. Stand near your garage door opener and press the button on the remote to see if the door responds.

  • If the door opens or closes as expected, your battery replacement was successful.
  • If the remote still doesn’t work, make sure the battery is properly installed and the remote is within range.

Common Issues After Replacing the Battery

While replacing the battery in your Craftsman Garage Door Opener Remote is usually a straightforward task, there are some common issues that could arise afterward. Let’s take a look at some of them and how to fix them.

1. Remote Not Responding After Battery Replacement

If your Craftsman Garage Door Opener Remote isn’t working after replacing the battery, try the following solutions:

  • Check the battery orientation: Ensure that the new battery is installed in the correct direction.
  • Reprogram the remote: Sometimes, the remote may lose its programming when the battery is removed. Reprogram the remote by following the programming instructions in your manual.
  • Test the remote with another battery: Try another new battery to rule out the possibility of receiving a defective one.

2. Remote Not Syncing with the Opener

If your remote isn’t syncing with the garage door opener after replacing the battery, follow the programming steps outlined in your owner’s manual. This typically involves pressing a “learn” button on the opener and then pressing the button on the remote to pair it with the opener.

3. Reduced Range

If the range of your Craftsman Garage Door Opener Remote has diminished after the battery replacement, consider the following:

  • Check for interference: Other wireless devices, such as Wi-Fi routers or Bluetooth devices, may cause interference. Try using the remote from different locations to rule out interference.
  • Replace the opener’s antenna: If your garage door opener has a damaged or short antenna, it could affect the remote’s range. Consider replacing the antenna if necessary.

Maintaining Your Craftsman Garage Door Opener Remote

Regular maintenance of your Craftsman Garage Door Opener Remote can help ensure it operates smoothly and extends its lifespan. Here are some tips for keeping your remote in top condition:

  1. Replace the battery regularly: Even if your remote is still working, it’s a good idea to replace the battery every 6-12 months to prevent issues from arising.
  2. Clean the remote: Dust and dirt can accumulate over time. Use a soft cloth to clean the remote, especially the buttons and battery compartment.
  3. Store the remote properly: Avoid exposing your remote to extreme temperatures or moisture, as this can damage the internal components.
  4. Test the remote periodically: Check the functionality of your remote every few months to ensure it continues to work correctly.

When to Replace Your Craftsman Garage Door Opener Remote

In some cases, your Craftsman Garage Door Opener Remote may not function properly even after a battery replacement. If you experience persistent issues such as buttons not responding, broken buttons, or complete failure to sync with the opener, it might be time to replace the remote.

Here are some signs that indicate a new remote is needed:

  • The remote is physically damaged (e.g., cracked casing or damaged buttons).
  • The remote is beyond repair or not responding despite troubleshooting.
  • The remote is too old and no longer compatible with your garage door opener.

Conclusion

Replacing the battery in your Craftsman Garage Door Opener Remote is an easy and effective way to restore its functionality. By following the simple steps outlined in this guide, you can ensure that your remote continues to work smoothly and reliably. Regular battery replacements and proper maintenance will keep your garage door opener running without interruptions, providing you with the convenience and security you need.

If you encounter issues after replacing the battery, follow the troubleshooting steps to identify the problem and fix it. However, if the remote is still not working after these efforts, it might be time to consider purchasing a new remote.

How To Change Battery In Craftsman Garage Door Opener Remote: A Step-by-Step Guide

How To Change Battery In Craftsman Garage Door Opener Remote

Garage door openers are essential for providing convenience and security for homeowners, and their remote controls are a critical component. Over time, the battery in your Craftsman garage door opener remote will need to be replaced. Knowing how to change the battery in Craftsman garage door opener remote is a useful skill that ensures continued reliable operation of your garage door system. In this article, we’ll walk you through the simple process of replacing the battery in your remote, troubleshooting tips, and how to extend the life of your remote.

How To Change Battery In Craftsman Garage Door Opener Remote

Why Do You Need to Change the Battery in Your Craftsman Garage Door Opener Remote?

Before diving into the process, it’s essential to understand why changing the battery in your remote is crucial. Here’s why you should keep an eye on the battery:

  1. Loss of Functionality:
    If the battery in your Craftsman remote is running low or has died, it will result in the remote not functioning properly. This could mean the garage door does not respond when you press the button, or it opens and closes erratically.
  2. Reduced Signal Strength:
    A weak battery can reduce the remote’s signal strength, causing it to take longer to communicate with the garage door opener.
  3. Prevention of Future Problems:
    Regularly replacing the battery in your Craftsman garage door opener remote helps prevent future issues with your garage door system.

Read tooo: Craftsman Garage Door Opener 1/2 HP Programming for Effortless Setup


How To Change Battery In Craftsman Garage Door Opener Remote: Step-by-Step Guide

Now that you understand why it’s important, here’s a straightforward guide on how to change the battery in Craftsman garage door opener remote.

Step 1: Gather the Necessary Tools

Before starting the process, ensure you have everything you need:

  • A small flathead screwdriver (if necessary for prying open the remote casing).
  • The correct replacement battery (usually a 12V battery, such as A23, 23A, or 12V Alkaline).
  • A clean and dry work surface.

If you’re unsure about which battery is compatible with your remote, refer to the user manual or check the battery type printed on the back of the remote.


Step 2: Locate the Battery Compartment

The battery compartment on Craftsman garage door opener remotes is typically located on the back of the remote. Depending on the model, it could be secured with screws or simply snap open with a click.

  • For snap-open remotes:
    Simply locate the small indentation or slot at the bottom or side of the remote. Use your fingernail or a small flathead screwdriver to pry the remote open carefully.
  • For screw-secured remotes:
    You may need to unscrew the back of the remote using a small screwdriver. Be sure to keep track of the screws so you can reassemble the remote afterward.

Step 3: Remove the Old Battery

Once you have opened the battery compartment, carefully remove the old battery. Be sure to note the orientation of the battery so that you can insert the new one in the correct direction. The battery will typically have a positive (+) side and a negative (-) side, and it’s crucial that you match the orientation when inserting the new battery.

  • Gently slide the old battery out of its compartment. If it’s stuck, use a small tool to carefully lift it out, but avoid damaging the interior of the remote.

Step 4: Insert the New Battery

Take your replacement battery and insert it into the compartment, ensuring it is placed in the correct orientation. The positive (+) end should usually face up, while the negative (-) end should face down, but check for any instructions printed inside the compartment to confirm.

Once the new battery is in place, close the battery compartment and press the edges of the remote to make sure it’s securely closed. If you’re working with a screw-sealed remote, screw the back cover back on tightly.


Step 5: Test the Remote

After replacing the battery, test the remote to ensure that it’s working correctly. Stand a few feet away from your garage door and press the button on your remote. The door should respond, either opening or closing depending on the direction.

  • If the door doesn’t respond, recheck the battery orientation and make sure the remote is functioning properly.
  • If the issue persists, refer to troubleshooting steps.

Troubleshooting Tips

If after replacing the battery your Craftsman garage door opener remote still doesn’t work, here are a few things you can try:

  1. Check the Battery Orientation:
    Make sure the new battery is inserted with the correct polarity. If the battery is inserted upside down, the remote won’t work.
  2. Replace the Battery Again:
    It’s possible the new battery was faulty. Try replacing it with another fresh battery.
  3. Reset the Remote:
    If the remote still isn’t responding, you may need to reprogram it with the garage door opener. Refer to your Craftsman opener’s manual for instructions on how to reset and reprogram the remote.
  4. Inspect for Physical Damage:
    Check the remote for any physical damage that could be preventing it from working properly. If the remote is damaged beyond repair, consider replacing it.

How to Extend the Life of Your Craftsman Garage Door Opener Remote

To ensure that your Craftsman garage door opener remote lasts as long as possible, here are a few tips for maintaining it:

  1. Regularly Replace the Battery:
    Don’t wait until the remote stops working completely. Change the battery every 1-2 years or sooner if you notice the signal weakening or if the door starts responding slowly.
  2. Keep It Clean:
    Dust and dirt can accumulate inside the remote, so it’s a good idea to clean it periodically. Use a dry cloth or compressed air to remove dust from the battery compartment and buttons.
  3. Avoid Exposure to Extreme Conditions:
    If possible, avoid leaving the remote exposed to extreme temperatures or humidity, as this can affect its performance.
  4. Store the Remote Properly:
    When not in use, keep the remote in a safe place where it’s less likely to get lost or damaged. A remote holder in your car or garage can prevent wear and tear.

Why Choosing the Right Battery Matters

Using the correct battery in your Craftsman garage door opener remote ensures the device works reliably. While many remotes use standard 12V batteries, make sure the replacement battery matches the model and specifications of your remote. Using an incorrect battery can cause damage to the remote or reduce its lifespan.


Conclusion

Learning how to change the battery in Craftsman garage door opener remote is an essential skill for maintaining the functionality of your garage door system. By following the steps outlined in this guide, you can easily replace the battery and ensure your remote continues to work seamlessly. Regular maintenance and battery replacement will keep your remote functioning for years to come, ensuring convenience and security every time you use your garage door opener.

Replacing Battery In Craftsman Garage Door Opener Remote: A Complete Guide for Better Functionality

Replacing Battery In Craftsman Garage Door Opener Remote

A garage door opener remote is one of the most convenient devices in your home, allowing you to open and close your garage door with the press of a button. However, over time, the battery in your Craftsman garage door opener remote will begin to deplete, affecting the performance of the remote. When your garage door remote starts to lose its signal or doesn’t work at all, it’s likely time for a battery replacement.

Replacing Battery In Craftsman Garage Door Opener Remote

In this article, we’ll take you through everything you need to know about replacing the battery in your Craftsman garage door opener remote. From recognizing the signs that your remote needs a new battery, to the steps for replacing the battery, we’ve got you covered.


Replacing Battery In Craftsman Garage Door Opener Remote: Why It’s Important

The remote for your Craftsman garage door opener uses a small battery to send a signal to the door’s motor. When the battery weakens or dies, it can cause the remote to become unresponsive or function improperly. A new battery will restore full functionality to the remote, ensuring smooth operation of your garage door opener.

It’s important to note that different models of Craftsman garage door opener remotes may use different types of batteries. Some models may use a common 3V lithium coin battery, while others may use AAA or AA batteries. Always check your remote’s manual to confirm the type of battery it requires.

Read tooo: Craftsman Garage Door Opener 1/2 HP Programming for Effortless Setup

How to Recognize When Your Craftsman Garage Door Opener Remote Needs a New Battery

Before you start the process of replacing the battery, you may wonder how to tell if your Craftsman garage door opener remote actually needs a new battery. Here are a few key signs to watch out for:

  1. Delayed Response: If you press the button on your remote and the garage door doesn’t respond immediately or takes longer than usual to open or close, your remote’s battery may be weakening.
  2. Reduced Range: If you have to press the button multiple times or stand closer to the garage door for the remote to work, this may indicate that the battery is low and needs to be replaced.
  3. Complete Failure: If the remote doesn’t respond at all, it’s likely that the battery has completely died and needs to be replaced.

If you’re noticing any of these issues, it’s time to replace the battery in your Craftsman garage door opener remote.


Step-by-Step Guide: Replacing Battery In Craftsman Garage Door Opener Remote

Now that you’ve determined it’s time to replace the battery in your Craftsman garage door opener remote, follow these simple steps to get the job done quickly.

Step 1: Gather the Necessary Tools

Before you begin, gather the following tools and materials:

  • A new battery (make sure to check the correct type for your remote model)
  • A small screwdriver (if necessary to open the remote’s casing)
  • A soft cloth (optional, for cleaning the remote’s components)

Step 2: Open the Remote’s Casing

The first step in replacing the battery is to open the remote’s casing. Depending on the design of your Craftsman remote, this may involve removing screws or simply sliding apart the two halves of the remote. Look for small screws on the back of the remote or a notch where you can pry the casing apart.

If your remote has screws, use a small screwdriver to carefully remove them. Be sure to keep them in a safe place, as you will need them to reassemble the remote later.

Step 3: Remove the Old Battery

Once you have the remote’s casing open, locate the old battery. Gently remove the old battery from its compartment. You may need to use your fingers or a small tool to lift the battery out.

Pay attention to how the battery is positioned within the compartment, as you will need to insert the new battery in the same orientation. If the battery has leaked or is corroded, clean the compartment with a soft cloth to remove any residue before proceeding.

Step 4: Insert the New Battery

Take the new battery and place it into the compartment, making sure to align it according to the positive (+) and negative (-) markings inside the compartment. For most Craftsman garage door opener remotes, the battery will be a coin-shaped lithium battery, but make sure to check your specific model for the correct battery type and size.

Ensure the battery is securely in place and that there is no movement. If the remote uses AA or AAA batteries, make sure they are oriented correctly.

Step 5: Reassemble the Remote

Once the new battery is in place, carefully snap the remote’s casing back together. If you had to remove screws earlier, reinsert them and tighten them securely, being careful not to overtighten.

If the casing slides together without screws, simply press the two halves of the remote back into place until you hear a click.

Step 6: Test the Remote

After replacing the battery and reassembling the remote, it’s time to test it. Stand at a reasonable distance from your garage door and press the button on the remote. The door should respond immediately by opening or closing.

If the remote still doesn’t work after the battery replacement, check to make sure the battery is properly inserted and that there’s no corrosion inside the compartment. You can also refer to your Craftsman garage door opener manual for additional troubleshooting tips.


Troubleshooting Tips for a Remote That Still Isn’t Working

If your remote is still not functioning properly after replacing the battery, try these troubleshooting steps:

1. Check the Battery Orientation

Make sure that the new battery is installed in the correct orientation. The positive side should match the markings inside the compartment.

2. Test the Remote Close to the Opener

Sometimes, low-range performance may simply be due to interference. Try standing closer to your garage door opener to see if it’s a range issue.

3. Reprogram the Remote

In some cases, the remote may need to be reprogrammed to sync with your garage door opener. Consult your remote’s manual for instructions on how to do this.

4. Check the Garage Door Opener’s Sensor

If the remote works intermittently, there may be an issue with the garage door opener’s sensor or the antenna. Check for obstructions or damage to the antenna on your opener unit.

5. Inspect for Other Issues

If none of the above steps solve the problem, there may be an issue with the remote’s internal components, in which case you might need to contact customer support or consider replacing the remote.


Additional Tips for Extending the Life of Your Craftsman Garage Door Opener Remote

To prevent future battery issues and extend the life of your Craftsman garage door opener remote, follow these additional tips:

  • Replace the Battery Regularly: Even if the remote is still working fine, it’s a good idea to replace the battery once a year to prevent unexpected failures.
  • Store Your Remote in a Safe Place: Avoid exposing the remote to extreme temperatures, moisture, or sunlight, as this can damage the battery or remote components.
  • Use High-Quality Batteries: Always use high-quality, brand-name batteries that are recommended for your remote to ensure proper functionality.
  • Clean the Remote: Periodically clean your remote by wiping it with a soft cloth. Keeping the remote free from dirt and grime can help prolong its lifespan.

Conclusion

Replacing the battery in your Craftsman garage door opener remote is a simple and quick task that can restore full functionality to your remote and ensure smooth operation of your garage door. By following the step-by-step guide outlined above, you can easily replace the battery and troubleshoot any issues that arise.

If you continue to have problems after replacing the battery, consult the manual or contact customer support for assistance. By keeping your remote in good working condition, you can enjoy the convenience and security it provides for years to come.

How to Replace Craftsman Garage Door Opener Remote Battery: A Step-by-Step Guide for Smooth Operation

Replace Craftsman Garage Door Opener Remote Battery

Garage door openers are an essential part of your home’s functionality, providing ease and convenience. However, like all electronic devices, their components wear out over time. One of the most common issues you might encounter is a failing remote battery. If you have a Craftsman garage door opener, knowing how to replace the battery in your remote can save you from unnecessary frustration. In this article, we will guide you through the steps for replacing the battery in your Craftsman garage door opener remote, ensuring your system continues to work seamlessly.

Replace Craftsman Garage Door Opener Remote Battery

Why Do Garage Door Opener Remote Batteries Need to Be Replaced?

Before we delve into the steps, it’s important to understand why your Craftsman garage door opener remote’s battery might need replacing. Over time, the battery in your remote will lose its charge due to usage and age. A weak or dead battery can result in several problems:

  • Reduced Range: As the battery weakens, the remote’s signal range may decrease, causing the door to respond only when you are very close to the opener.
  • Failure to Open or Close: If the battery is completely drained, the remote will not be able to send the signal to the opener, rendering it ineffective.
  • Intermittent Functionality: The remote may work intermittently, causing frustration as the door opens and closes unpredictably.

To maintain smooth operation, it is essential to replace the remote battery when these issues occur.


How To Replace Craftsman Garage Door Opener Remote Battery: Step-by-Step Guide

Replacing the battery in your Craftsman garage door opener remote is a straightforward process. By following this step-by-step guide, you can quickly restore the functionality of your remote and get your garage door working again.

Read too: Craftsman Garage Door Keypad Not Working? Here’s How to Troubleshoot and Fix It

1. Identify the Type of Battery You Need

The first step is to determine what type of battery your Craftsman garage door opener remote requires. Most Craftsman remotes use 12V batteries, commonly known as A23 batteries. However, it’s always best to verify by checking the remote’s user manual or inspecting the battery compartment.

You can also look for markings on the battery already installed in the remote to identify the battery type. Once you’ve confirmed the type, it’s time to purchase a replacement.

2. Gather Necessary Tools and Materials

Before you begin replacing the battery, make sure you have the following tools and materials ready:

  • A new 12V A23 battery (or the appropriate battery for your model).
  • A small screwdriver (if the battery compartment is screwed shut).
  • A clean, dry cloth to wipe down the remote.

These tools should be all you need for the task.


3. Open the Remote Battery Compartment

The next step is to open the battery compartment of your Craftsman remote. Depending on the model, the remote may have a sliding cover, or it may be held shut with screws. Here’s how to open it:

  • Sliding Cover: If your remote has a sliding cover, gently slide it open to expose the battery.
  • Screw-Locked Compartment: If there are screws, use a small screwdriver to carefully unscrew the back panel of the remote.

Be careful not to lose the screws if your remote uses them. Once the compartment is open, you should see the old battery.


4. Remove the Old Battery

Once the compartment is open, carefully remove the old battery. Pay attention to the battery’s orientation—most batteries have a positive (+) and negative (-) end. When you insert the new battery, it should match the same polarity.

Use your fingers to gently pull the old battery out. If it’s stuck, lightly tap the remote or use a small tool (like a toothpick) to help ease it out. Be cautious not to damage the remote in the process.


5. Insert the New Battery

Now that the old battery is removed, it’s time to insert the new one. Take your new 12V A23 battery and place it in the compartment, making sure that the positive (+) and negative (-) ends are aligned correctly.

  • Positive End First: Place the positive end (usually marked with a + symbol) first, as this is typically the correct orientation for most remote models.
  • Press Down Gently: Once the new battery is positioned correctly, press down gently to ensure that it fits securely in the compartment.

If the compartment uses a sliding cover, simply slide it back into place. If screws are involved, carefully screw the back panel back on.


6. Test the Remote

After replacing the battery, it’s essential to test the remote to make sure it’s functioning properly. Stand at a reasonable distance from the garage door opener and press the button on the remote. The door should open or close smoothly if the battery has been installed correctly.

If the remote still doesn’t work, double-check the battery’s orientation and ensure it’s securely in place. Also, test the battery with a multimeter to ensure it’s properly charged.


Tips for Extending the Life of Your Craftsman Garage Door Opener Remote Battery

To prevent frequent battery replacements, there are a few habits you can adopt that will help extend the life of your Craftsman garage door opener remote battery:

1. Limit Remote Usage

Although this may seem obvious, reducing the number of times you use the remote can help conserve battery life. Try to use the wall-mounted opener or the keypad entry when possible, especially if you’re opening the door frequently.

2. Store the Remote in a Safe Place

Avoid exposing the remote to extreme temperatures. High heat or extreme cold can drain the battery faster. Keep the remote in a cool, dry place when not in use.

3. Regularly Check the Battery

Even if you’re not experiencing any issues, it’s a good idea to check the battery periodically. If the remote starts to show signs of reduced range or intermittent functionality, it might be time for a replacement.


Common Issues and Solutions for Craftsman Garage Door Remotes

While replacing the battery often resolves many issues, you may encounter other problems with your Craftsman garage door opener remote. Here are a few common issues and their solutions:

1. Remote Not Responding After Battery Replacement

If the remote doesn’t work after replacing the battery, try reprogramming it to the garage door opener. Sometimes, the signal between the remote and opener gets disrupted. Follow your manual to reprogram the remote.

2. Interference or Signal Issues

If your remote has become less responsive or has a reduced range, interference could be the issue. Ensure there are no objects obstructing the signal path, such as large metal objects or other electronic devices near the opener.


Conclusion

Replacing the battery in your Craftsman garage door opener remote is a simple process that can restore the full functionality of your system. By following the steps outlined above, you can quickly and easily replace the battery and get back to enjoying the convenience of your remote-controlled garage door.

Remember to regularly check the battery and store the remote properly to extend its life. If you encounter any issues, don’t hesitate to reprogram your remote or consult the manual for troubleshooting tips.

Sears Craftsman Garage Door Opener Remote Battery Replacement: A Complete Guide

Sears Craftsman Garage Door Opener Remote Battery Replacement

Owning a Sears Craftsman garage door opener comes with many conveniences, including the ability to open and close your garage door remotely. However, like all battery-operated devices, the remote control will eventually need a battery replacement. If your Sears Craftsman garage door opener remote isn’t working properly, one of the first things to check is the battery.

Sears Craftsman Garage Door Opener Remote Battery Replacement

In this article, we will walk you through everything you need to know about Sears Craftsman garage door opener remote battery replacement, including how to identify when your remote needs a new battery, the steps to replace the battery, and some helpful tips to ensure your remote continues to work effectively.

Why Your Sears Craftsman Garage Door Opener Remote Battery Needs Replacement

Before diving into the steps for replacing the battery, it’s essential to understand why the remote may stop working. Typically, the battery in the Sears Craftsman garage door opener remote will wear out over time, which can result in poor functionality or complete failure. Here are a few signs that the battery might be running low:

1. Remote Doesn’t Work Consistently

If your remote has become unreliable, only working intermittently or requiring multiple presses before it opens or closes the garage door, the battery is likely running low and needs to be replaced.

2. Weak or No Signal

When the remote’s battery begins to die, the signal it sends to the Sears Craftsman garage door opener will weaken. This may result in the garage door not responding to the remote, or it may take longer than usual for the door to open or close.

Read too: Craftsman Garage Door Keypad Not Working? Here’s How to Troubleshoot and Fix It

3. No Response from the Remote

In some cases, a dead battery may completely render the remote unusable. If pressing the buttons on your remote doesn’t result in any action, the battery is most likely dead and needs immediate replacement.

Now that we’ve established why the battery needs replacement, let’s walk you through how to replace the Sears Craftsman garage door opener remote battery.

Sears Craftsman Garage Door Opener Remote Battery Replacement: Step-by-Step Guide

Replacing the battery in your Sears Craftsman garage door opener remote is a simple and straightforward process that can be completed in just a few minutes. Here’s a step-by-step guide to help you replace the battery:

Step 1: Identify the Correct Battery Type

The first step in the Sears Craftsman garage door opener remote battery replacement process is to determine the type of battery your remote uses. Most Craftsman remotes use a 3V battery, such as the CR2032, CR2016, or CR2025 coin cell batteries. However, the specific battery type may vary depending on the model of your remote.

Check the back of the remote for a small compartment where the battery is housed. The battery type may be listed on the compartment or in the user manual for your specific model.

Step 2: Open the Remote

Once you’ve identified the correct battery type, the next step is to open the remote to access the battery. Follow these simple steps:

  1. Look for a Small Notch or Seam: Most Sears Craftsman garage door opener remotes have a small notch or seam along the edge that allows you to pry the remote open.
  2. Use a Small Flathead Screwdriver or Coin: Gently insert a flathead screwdriver or a coin into the notch and twist it to separate the remote’s two halves.
  3. Remove the Old Battery: After opening the remote, carefully remove the old battery from its compartment.

Step 3: Install the New Battery

Now that you’ve removed the old battery, it’s time to install the new one:

  1. Insert the New Battery: Take the new battery and insert it into the compartment with the correct polarity. The positive side of the battery (usually marked with a “+” sign) should face up.
  2. Ensure Proper Fit: Make sure the battery fits snugly in the compartment and is securely in place.

Step 4: Close the Remote and Test It

Once the new battery is installed, it’s time to close the remote:

  1. Snap the Remote Back Together: Gently press the two halves of the remote back together until they snap into place.
  2. Test the Remote: Press the buttons on the remote to test if the new battery is working. If the garage door opens or closes as expected, the battery replacement was successful.

Step 5: Dispose of the Old Battery Properly

Don’t forget to dispose of the old battery properly. Many local recycling centers or electronic stores offer battery recycling services. Be sure to check your area’s guidelines for battery disposal to ensure proper and eco-friendly disposal.

Additional Tips for Maintaining Your Sears Craftsman Garage Door Opener Remote

To prolong the life of your Sears Craftsman garage door opener remote and prevent the need for frequent battery replacements, here are a few additional maintenance tips:

1. Store the Remote Properly

If you don’t use your remote frequently, store it in a cool, dry place. Avoid leaving the remote in direct sunlight or in areas with extreme temperatures, as this can cause the battery to drain more quickly.

2. Replace the Battery Regularly

Even if the remote is still working, it’s a good idea to replace the battery every year or so to prevent it from dying unexpectedly. Regular battery replacements can help avoid inconvenience and ensure the remote always functions when you need it.

3. Clean the Remote

Dust and dirt can accumulate on your remote, especially if you use it frequently. Regularly clean the remote with a soft, dry cloth to keep it in good condition and prevent dirt from interfering with its buttons or signal.

4. Test the Remote Occasionally

Every few months, test the remote to ensure it’s working properly. If you notice any signs of weak performance (e.g., the remote is less responsive or requires multiple presses), replace the battery sooner rather than later.

Conclusion

A dead or weak battery in your Sears Craftsman garage door opener remote can cause inconvenience and frustration, but it’s an issue that’s easy to fix with a Sears Craftsman garage door opener remote battery replacement. By following the simple steps outlined above, you can replace the battery in just a few minutes and get your remote working like new again.

Remember to store your remote properly, replace the battery regularly, and clean it to extend its lifespan and ensure it functions properly for years to come.

What Battery Does a Craftsman Garage Door Opener Remote Use? Your Complete Guide

What Battery Does A Craftsman Garage Door Opener Remote Use

Garage door openers are essential tools that make accessing your garage convenient and secure. Among the many brands, Craftsman garage door openers are known for their reliability and performance. One common question many users have is, What battery does a Craftsman garage door opener remote use? This guide will dive deep into answering that question while providing essential information to keep your garage door remote functioning optimally.

What Battery Does A Craftsman Garage Door Opener Remote Use

Understanding Your Craftsman Garage Door Opener Remote

Craftsman remotes are designed to be user-friendly, durable, and long-lasting. However, like any electronic device, the remote relies on batteries to function. If your remote stops working or the signal weakens, chances are the battery needs replacement. Knowing which battery type to use and how to replace it can save you time, money, and the hassle of calling a technician.

Read too: Craftsman Garage Door Keypad Not Working? Here’s How to Troubleshoot and Fix It


What Battery Does a Craftsman Garage Door Opener Remote Use?

The Craftsman garage door opener remote typically uses a 3V lithium coin cell battery, such as the CR2032 or CR2025. These batteries are commonly found in many electronic devices and are known for their compact size and long lifespan. Some older Craftsman models may use different batteries, so always refer to your user manual for confirmation.

Common Batteries for Craftsman Remotes:

  1. CR2032 – A widely used 3V coin cell battery with high capacity and reliability.
  2. CR2025 – Slightly thinner than the CR2032 but still compatible with many Craftsman remotes.
  3. AAA Alkaline Batteries – Found in a few older models that use a different design.

If you’re unsure about the specific battery for your model, check the battery compartment for markings or consult the manual.


Signs That Your Craftsman Remote Battery Needs Replacement

Even the best batteries wear out over time. Here are common signs that indicate it’s time to replace your remote’s battery:

  • Weak Signal: The garage door opener responds only when you are close to the door.
  • Inconsistent Operation: The remote sometimes works and sometimes doesn’t.
  • No Response: Pressing the buttons on the remote does not activate the garage door.

Changing the battery as soon as you notice these issues ensures smooth operation and prevents complete remote failure.


How to Replace the Battery in Your Craftsman Garage Door Opener Remote

Replacing the battery in your Craftsman remote is straightforward. Follow these steps:

  1. Gather the Tools: You’ll need the correct replacement battery (CR2032 or CR2025), a small screwdriver, and a clean workspace.
  2. Open the Battery Compartment:
    • Locate the seam or latch on the remote.
    • Use the screwdriver to carefully pry open the compartment without damaging the casing.
  3. Remove the Old Battery:
    • Take note of the battery’s orientation (positive side up or down).
    • Gently remove the old battery and dispose of it responsibly.
  4. Insert the New Battery:
    • Place the replacement battery in the same orientation as the old one.
    • Ensure it sits snugly in its slot.
  5. Close the Compartment:
    • Snap the compartment back into place or tighten the screws.
    • Test the remote to confirm it’s working correctly.

Where to Buy Replacement Batteries

Replacement batteries for Craftsman garage door remotes are widely available. Here are some convenient places to purchase them:

  1. Local Retail Stores: Home improvement stores like Lowe’s or Home Depot often stock CR2032 and CR2025 batteries.
  2. Electronics Shops: Stores specializing in electronics usually carry a range of coin cell batteries.
  3. Online Retailers: Platforms like Amazon, Walmart, and eBay offer affordable battery options with fast shipping.
  4. Supermarkets and Pharmacies: Many large supermarkets and pharmacies have a small electronics section with basic batteries.

Tips to Extend Battery Life

While replacing batteries is straightforward, prolonging their lifespan can save you effort and money. Here are tips to maximize battery performance:

  • Avoid Extreme Temperatures: Batteries perform best in moderate temperatures. Avoid leaving your remote in overly hot or cold environments.
  • Minimize Button Pressing: Press buttons only when necessary, as frequent use drains the battery faster.
  • Turn Off Unused Features: Some remotes have additional buttons or functions. Disabling unused features can reduce power consumption.
  • Inspect Periodically: Check the battery every six months, especially if the remote is used frequently.

Frequently Asked Questions (FAQs)

How often should I replace the battery in my Craftsman garage door opener remote?

Most batteries last 1–2 years, depending on usage. If you use the remote multiple times a day, you may need to replace the battery annually.

Can I use a different battery brand?

Yes, as long as the battery meets the required specifications (e.g., CR2032). However, using a reputable brand ensures reliability and safety.

What should I do if replacing the battery doesn’t fix the remote?

If the remote doesn’t work after replacing the battery, try the following:

  • Check if the battery is inserted correctly.
  • Ensure the remote is paired with the garage door opener.
  • Inspect for physical damage or contact Craftsman support for further assistance.

Conclusion

Understanding what battery does a Craftsman garage door opener remote use is essential for maintaining your device’s functionality. Most models use CR2032 or CR2025 coin cell batteries, which are easy to find and replace. By following the steps outlined in this guide, you can ensure your remote remains reliable and hassle-free.

When it’s time to replace your battery, remember to dispose of the old one responsibly and consider buying high-quality replacements for optimal performance. With proper care, your Craftsman garage door opener remote will serve you well for years to come.

Craftsman 1/2 Hp Garage Door Opener Remote Battery: How to Choose, Replace, and Maintain It

Craftsman 1/2 Hp Garage Door Opener Remote Battery

The Craftsman 1/2 Hp Garage Door Opener Remote Battery plays a crucial role in the smooth operation of your garage door opener remote. A reliable battery ensures that your remote continues to function effectively, allowing you to control your garage door with ease. In this article, we’ll explore everything you need to know about the Craftsman 1/2 Hp Garage Door Opener Remote Battery. From selecting the right battery to tips on replacing and maintaining it, you’ll learn all the essential information to keep your remote in optimal condition.

Craftsman 1/2 Hp Garage Door Opener Remote Battery

Understanding the Craftsman 1/2 Hp Garage Door Opener Remote

Before delving into the specifics of the Craftsman 1/2 Hp Garage Door Opener Remote Battery, it’s important to understand how the remote works. The Craftsman 1/2 Hp Garage Door Opener Remote is designed to communicate with the garage door opener system, enabling you to open and close the garage door without leaving your car or home. The remote uses a battery to send a signal to the opener, and without a properly functioning battery, the remote will not work.

Read tooo: Craftsman Garage Door Opener 1/2 HP Programming for Effortless Setup

Why Is the Battery So Important?

The battery in your Craftsman 1/2 Hp Garage Door Opener Remote powers the signal transmission. It’s essential for the remote’s functionality, and without a charged or properly installed battery, your remote will be ineffective. Typically, the Craftsman 1/2 Hp Garage Door Opener Remote uses a 12V battery, but it’s important to confirm the specific model and battery requirements for your opener remote.


How to Choose the Right Battery for Your Craftsman 1/2 Hp Garage Door Opener Remote

Selecting the correct battery is vital to ensure your Craftsman 1/2 Hp Garage Door Opener Remote functions correctly. Here’s a step-by-step guide to help you choose the right one:

Step 1: Check the Remote Model Number

Before purchasing a replacement battery, check your remote’s model number. The model number is often found on the back or inside the remote. It will help you identify the right battery type and specifications.

Step 2: Identify the Battery Type

The Craftsman 1/2 Hp Garage Door Opener Remote typically uses a 12V battery, but there are several types of batteries that can be compatible. Common options include:

  • 12V A23 Batteries: These batteries are commonly used in Craftsman remotes and are easily available.
  • 12V 23A Batteries: Another option for Craftsman remotes, similar in size and voltage to the A23 battery.

Ensure that you purchase a battery with the correct voltage and size to fit your remote. You can also consult your user manual or the manufacturer’s website for exact specifications.

Step 3: Choose a Reliable Battery Brand

While there are many battery brands available, it’s best to choose one that’s reliable and well-known, such as Duracell, Energizer, or Panasonic. Quality batteries will last longer and provide more consistent performance compared to cheaper, off-brand options.


How to Replace the Craftsman 1/2 Hp Garage Door Opener Remote Battery

Replacing the Craftsman 1/2 Hp Garage Door Opener Remote Battery is a quick and easy task. Here’s a step-by-step guide to help you with the replacement process:

Step 1: Open the Remote

Most Craftsman remote controls can be easily opened by removing the back cover or unscrewing the case. Use a small screwdriver or your hands to carefully open the remote. Be sure to do this gently to avoid damaging the remote.

Step 2: Remove the Old Battery

Once the remote is open, you will see the old battery. Take note of how the battery is positioned, including which side is facing up. This will be important when installing the new battery.

Carefully remove the old battery, making sure not to damage any of the internal components. Dispose of the old battery properly by recycling it at a designated recycling center or battery disposal location.

Step 3: Install the New Battery

Now that the old battery is removed, insert the new battery into the remote, ensuring that it is placed in the correct orientation. Typically, the positive side (+) should be facing up, but check the battery compartment for any indicators.

Step 4: Close the Remote

Once the new battery is securely installed, close the remote by snapping the back cover or screwing the case back together. Ensure that the remote is properly sealed to prevent dust or moisture from entering.

Step 5: Test the Remote

After replacing the battery, test the remote by pressing the button to see if it opens or closes the garage door. If it works, you’ve successfully replaced the battery. If the remote still doesn’t function, you may need to troubleshoot or try a different battery.


How to Maintain the Craftsman 1/2 Hp Garage Door Opener Remote Battery

Proper maintenance of the Craftsman 1/2 Hp Garage Door Opener Remote Battery can help extend its lifespan and ensure optimal performance. Here are a few tips to keep your remote’s battery in good condition:

1. Replace the Battery Regularly

Even if your remote is still working, it’s a good idea to replace the battery every 6–12 months to avoid unexpected failures. If you notice a decrease in range or difficulty operating the door, it’s time to replace the battery.

2. Keep the Remote Clean

Dirt, dust, and debris can interfere with the remote’s performance. Clean the remote regularly with a soft cloth and avoid getting moisture inside the remote.

3. Store the Remote Properly

If you’re not using the remote for an extended period, such as when you’re going on vacation, remove the battery to prevent it from leaking and causing damage. Storing the remote in a cool, dry place will also help prolong the life of the battery.

4. Test the Remote Often

Make it a habit to test your remote every few weeks to ensure that it’s still working. If the garage door opener starts to respond slower or the remote is not working as effectively, replace the battery promptly.


Troubleshooting Common Issues with the Craftsman 1/2 Hp Garage Door Opener Remote

There are several common issues that can occur with your Craftsman 1/2 Hp Garage Door Opener Remote. Here are some troubleshooting tips to help you resolve these problems:

1. Remote Not Working After Replacing the Battery

If the remote is not working after replacing the battery:

  • Check the battery orientation: Ensure the battery is installed in the correct orientation.
  • Try a different battery: The battery may be faulty. Try using another new battery to see if it works.
  • Reprogram the remote: If the remote is not working even with a new battery, it may need to be reprogrammed.

2. Short Battery Life

If the battery drains quickly:

  • Check for excessive use: If you use the remote frequently, the battery may need to be replaced more often.
  • Inspect for damage: Ensure that the remote isn’t damaged or exposed to extreme temperatures, as this can affect battery life.

3. Weak Signal Range

If the remote has a weak signal or the garage door does not open from a distance:

  • Replace the battery: A weak battery can reduce the range of the signal. Replace the battery to restore normal function.
  • Check the antenna: Ensure that the antenna on the garage door opener is properly extended and not obstructed.

Conclusion

The Craftsman 1/2 Hp Garage Door Opener Remote Battery is essential for the reliable operation of your garage door opener remote. Choosing the right battery, replacing it regularly, and maintaining it properly will ensure your remote works smoothly and effectively. By following the guidelines outlined in this article, you can extend the life of your Craftsman 1/2 Hp Garage Door Opener Remote and avoid unnecessary frustrations.

How to Change Battery in Craftsman Garage Door Opener Keypad: A Step-by-Step Guide

How To Change Battery In Craftsman Garage Door Opener Keypad

If you’re experiencing issues with your Craftsman garage door opener keypad, such as it not responding or the display fading, the problem could be as simple as a dead battery. Replacing the battery in your keypad is an easy and affordable fix that can restore its functionality. In this article, we’ll provide a complete guide on how to change battery in Craftsman garage door opener keypad, along with helpful tips and troubleshooting advice to keep your keypad working efficiently.

How To Change Battery In Craftsman Garage Door Opener Keypad

Changing the battery in your Craftsman garage door opener keypad is a straightforward process. This guide will walk you through the necessary steps, the types of batteries you’ll need, and some essential tips to ensure your keypad continues to work flawlessly.


Why Is it Important to Change the Battery in Your Craftsman Garage Door Opener Keypad?

Before diving into how to change battery in Craftsman garage door opener keypad, let’s first discuss why it’s important to replace the batteries regularly.

  1. Reliable Performance: The keypad relies on a battery to send signals to the opener. If the battery is low or dead, the keypad won’t work properly, preventing you from opening or closing your garage door.
  2. Security: A working keypad is essential for maintaining secure access to your garage. If the keypad stops functioning, you may be locked out or unable to control your garage door.
  3. Cost-Effective: Changing the battery is an inexpensive solution compared to replacing the entire keypad. Regular maintenance can save you money and keep your keypad operating efficiently.

Read tooo: Craftsman Garage Door Opener 1/2 HP Programming for Effortless Setup


How to Change Battery in Craftsman Garage Door Opener Keypad

Changing the battery in your Craftsman garage door opener keypad is a simple task that requires only basic tools. Below is a step-by-step guide to help you complete the job quickly.

Step 1: Gather Your Tools and Materials

Before you begin, you’ll need a few items:

  • A new battery (usually a 9V battery, but check your keypad’s manual to confirm)
  • A small screwdriver (if your keypad requires screws to open)
  • A clean cloth or towel to place the keypad on while you work (optional)

Make sure you have everything ready so you can replace the battery without interruption.

Step 2: Locate the Keypad Battery Compartment

The battery compartment is typically located on the back or bottom of the Craftsman garage door opener keypad. To access it, you’ll need to remove the cover, which is usually secured with screws or clips.

  • If there are screws: Use a small screwdriver to remove the screws holding the keypad cover in place. Keep these screws safe, as you’ll need them to reassemble the keypad.
  • If there are clips: Gently pull on the cover to release the clips and expose the battery compartment.

Step 3: Remove the Old Battery

Once you’ve accessed the battery compartment, carefully remove the old battery. It may be helpful to take note of how the battery is installed so you can install the new one in the same orientation.

  • Take note of the battery orientation: The positive (+) and negative (-) terminals must align correctly with the connectors inside the battery compartment.
  • Dispose of the old battery properly: Make sure to recycle the old battery according to your local guidelines. Many electronics stores offer battery recycling stations.

Step 4: Install the New Battery

Now that you’ve removed the old battery, it’s time to install the new one. Make sure the new battery matches the specifications required by your Craftsman garage door opener keypad.

  • Insert the new battery into the compartment, ensuring the positive (+) and negative (-) terminals align correctly with the corresponding connectors.
  • Press the battery down gently to ensure it’s seated securely in place.

Step 5: Reassemble the Keypad

Once the new battery is installed, it’s time to reassemble the keypad:

  • Replace the cover and secure it with screws or clips.
  • If there are screws, tighten them gently to avoid over-tightening, which could damage the keypad housing.

Step 6: Test the Keypad

After replacing the battery and reassembling the keypad, it’s important to test the keypad to ensure it’s working properly. To do this:

  • Enter your PIN on the keypad and press the Enter button.
  • If the garage door responds (opens or closes), then the new battery has been successfully installed, and your keypad is working again.

If the keypad does not respond, double-check the battery installation to ensure the terminals are properly aligned.


Tips for Extending the Life of Your Craftsman Garage Door Opener Keypad Battery

To ensure your keypad continues to work effectively, here are some tips to help extend the life of the battery:

  1. Use high-quality batteries: Invest in high-quality, long-lasting batteries, such as name-brand 9V batteries. Cheap, low-quality batteries can wear out quickly and may even leak, damaging the keypad.
  2. Turn off the keypad when not in use: If your keypad allows you to turn it off when not in use, doing so can help conserve battery life.
  3. Check the battery regularly: Keep an eye on the performance of your keypad. If you notice the display fading or the keypad becoming unresponsive, it’s time to replace the battery.
  4. Avoid extreme temperatures: Avoid installing the keypad in areas with extreme temperatures, as this can cause the battery to deplete more quickly.
  5. Perform regular maintenance: Clean the keypad periodically to remove dirt or moisture, which can affect the battery and its performance.

Troubleshooting: What to Do If Your Craftsman Keypad Isn’t Working After a Battery Change

If your Craftsman garage door opener keypad still isn’t working after you’ve changed the battery, here are a few troubleshooting steps:

1. Double-check the battery installation

Ensure that the new battery is installed correctly, with the positive and negative terminals aligned properly with the connectors.

2. Verify the battery type

Ensure you’re using the correct type of battery (typically a 9V battery for most Craftsman keypads). Using the wrong battery type could cause the keypad to malfunction.

3. Reset the keypad

If the keypad is still unresponsive, you might need to reset it. Refer to your Craftsman manual for specific instructions on how to reset your keypad.

4. Test the garage door opener

If the keypad seems to be functioning properly but still isn’t controlling the garage door, the issue might be with the opener itself. Test the opener with a remote or by pressing the wall button to see if it’s working.


Conclusion

Changing the battery in your Craftsman garage door opener keypad is a simple process that can be completed in just a few minutes. By following the steps outlined in this article, you can restore functionality to your keypad and continue to enjoy the convenience and security of keyless entry to your garage. Remember to perform regular maintenance, use high-quality batteries, and troubleshoot any issues promptly to ensure your keypad remains in top condition.

Craftsman 315 Garage Door Opener Keypad Battery Replacement: Step-by-Step Instructions

Craftsman 315 Garage Door Opener Keypad Battery Replacement

If you’re facing issues with your Craftsman 315 Garage Door Opener Keypad not responding, it’s likely time for a battery replacement. Replacing the battery in your keypad is a simple yet essential task that ensures the smooth operation of your garage door opener. In this guide, we will walk you through the step-by-step process of Craftsman 315 Garage Door Opener Keypad Battery Replacement, providing useful tips, troubleshooting solutions, and essential information to keep your system running smoothly.

Craftsman 315 Garage Door Opener Keypad Battery Replacement

Why Does the Craftsman 315 Garage Door Opener Keypad Need a Battery Replacement?

The Craftsman 315 Garage Door Opener Keypad is an essential component for many homeowners who use their garage doors regularly. This keypad allows you to open or close the garage door without needing to carry a remote. Over time, the batteries in the keypad will wear out due to frequent use, causing the keypad to stop functioning properly.

If your keypad isn’t responding to your code or you notice intermittent issues, it’s a sign that the battery might be low or dead. Replacing the battery is necessary to restore full functionality and prevent further issues. Keeping the battery fresh in your Craftsman 315 Garage Door Opener Keypad is crucial to maintaining the convenience and security it provides.

Read tooo: Craftsman Garage Door Opener 1/2 HP Programming for Effortless Setup


How to Perform Craftsman 315 Garage Door Opener Keypad Battery Replacement

Step 1: Gather the Necessary Tools

Before starting the Craftsman 315 Garage Door Opener Keypad Battery Replacement, ensure you have the following tools and materials:

  • New batteries (typically 9V or AA batteries, depending on your model)
  • A small flathead screwdriver (to open the battery compartment)
  • A clean cloth (for wiping any dust or dirt off the keypad)

Having everything ready will make the process smoother and more efficient.

Step 2: Identify the Battery Compartment

On most Craftsman 315 Garage Door Opener Keypads, the battery compartment is located on the back of the keypad. To find it, follow these steps:

  1. Remove the Keypad from the Wall: Gently lift the keypad from its mounted location. Depending on your installation, you may need to unscrew the unit from the wall.
  2. Locate the Battery Cover: On the back of the keypad, you’ll find a small battery cover. This cover typically has a small slot where you can insert a flathead screwdriver or your fingernail to pry it open.

Step 3: Remove the Old Batteries

Once the battery compartment is accessible, proceed with the following:

  1. Open the Battery Compartment: Use a flathead screwdriver to gently pry open the battery compartment cover.
  2. Remove the Old Batteries: Take out the old or depleted batteries carefully. Pay attention to the orientation of the batteries (positive and negative ends), as you’ll need to install the new batteries in the same direction.

Step 4: Insert the New Batteries

Now that the old batteries are removed, it’s time to replace them with fresh ones.

  1. Insert the New Batteries: Place the new batteries into the compartment, ensuring they are oriented correctly according to the polarity symbols inside the compartment.
  2. Close the Battery Compartment: Once the new batteries are in place, securely close the battery compartment. Press the cover back into place, making sure it snaps shut.

Step 5: Test the Keypad

After the battery replacement is complete, it’s important to test the Craftsman 315 Garage Door Opener Keypad to ensure that everything is working properly.

  1. Reattach the Keypad to the Wall: If you had removed the keypad from its mounted location, reattach it securely.
  2. Enter Your Code: Enter your PIN code on the keypad and press the “Enter” button. The garage door should open or close based on your input.
  3. Check for Response: If the door responds correctly, the battery replacement was successful.

If the door doesn’t respond, double-check the battery orientation and try again. If problems persist, recheck the programming or consult the manual for further troubleshooting.


Troubleshooting Issues After Battery Replacement

While battery replacement is often straightforward, some issues may still arise after replacing the battery. Here are a few troubleshooting tips to help resolve common problems:

Issue 1: The Keypad Still Doesn’t Work

If your Craftsman 315 Garage Door Opener Keypad doesn’t respond after replacing the battery, try the following:

  1. Check the Battery Connections: Ensure that the batteries are properly inserted with the correct polarity.
  2. Test the Batteries: Make sure the new batteries are fresh and functional. Sometimes, even new batteries can be faulty.
  3. Reprogram the Keypad: If the keypad isn’t syncing with the garage door opener, you may need to reprogram it. Follow the instructions in the manual to reset the programming.

Issue 2: The Keypad Is Unresponsive or Flashes

If your keypad is flashing or remains unresponsive even after replacing the battery, it could be due to signal interference or an issue with the opener’s memory. In this case, you can:

  1. Check for Obstructions: Ensure there are no obstructions between the keypad and the garage door opener.
  2. Clear the Opener’s Memory: Some models may require you to clear the opener’s memory and reprogram the keypad.

Issue 3: Keypad Buttons Are Sticking

If the buttons on the keypad are sticking or not responding properly, try cleaning the keypad gently with a cloth. Dirt and debris can sometimes cause the buttons to malfunction. If cleaning doesn’t help, you may need to replace the keypad altogether.


Benefits of Regular Battery Replacement for Craftsman Keypads

Replacing the batteries in your Craftsman 315 Garage Door Opener Keypad regularly is essential for several reasons:

  1. Enhanced Reliability: Regular battery replacements ensure that your keypad remains reliable, allowing for uninterrupted access to your garage.
  2. Improved Security: A working keypad reduces the risk of unauthorized access to your garage, ensuring the security of your home.
  3. Cost-Effective: Replacing the battery is a simple and inexpensive way to maintain your system without needing professional help.
  4. Convenience: A functioning keypad eliminates the hassle of using physical keys or remotes, providing a convenient and seamless experience for users.

When Should You Replace the Battery?

The battery life of the Craftsman 315 Garage Door Opener Keypad typically lasts between one and two years, depending on how often the keypad is used. However, it’s a good idea to replace the batteries every year or whenever you notice signs of reduced performance, such as:

  • Delayed response when entering your PIN code
  • Intermittent functionality
  • Flashing or unlit keypad screen

By replacing the battery proactively, you can avoid frustrating situations and ensure smooth operation.


Conclusion

Replacing the battery in your Craftsman 315 Garage Door Opener Keypad is an essential part of maintaining the functionality and reliability of your garage door system. By following the simple step-by-step instructions outlined in this guide, you can quickly and easily replace the battery and get your keypad working like new again.

Regular battery maintenance will not only keep your keypad operational but also improve the security and convenience of accessing your garage. If problems persist after replacing the battery, consult your owner’s manual or contact a professional technician for further assistance.

How To Change Craftsman Garage Door Opener Battery: A Step-by-Step Guide

How To Change Craftsman Garage Door Opener Battery

Your Craftsman garage door opener remote is a key to convenience in your daily life, providing effortless access to your garage. However, like any battery-powered device, the remote needs periodic maintenance. This comprehensive guide will walk you through how to change Craftsman garage door opener battery, ensuring your remote continues to function seamlessly.

How To Change Craftsman Garage Door Opener Battery

Why Learn How To Change Craftsman Garage Door Opener Battery?

Replacing the battery in your Craftsman garage door opener remote is essential for several reasons:

  1. Uninterrupted Functionality: A fresh battery ensures your remote operates efficiently.
  2. Improved Convenience: You won’t have to deal with unresponsive buttons or limited range.
  3. Enhanced Security: A functioning remote ensures consistent control over garage access.

By knowing how to replace the battery, you save time, avoid inconvenience, and prolong the life of your device.

Read too: Craftsman Garage Door Opener Troubleshooting Won’t Close: Quick Fixes and Solutions


Understanding Craftsman Garage Door Opener Batteries

Craftsman garage door openers use specific types of batteries depending on the model. Most remotes require:

  • Coin-Cell Batteries: Common types like CR2032 or CR2016.
  • 12-Volt Alkaline Batteries: Found in certain larger remotes or keypads.

Knowing your remote’s battery type is the first step in the replacement process.


Signs You Need to Change the Battery

How can you tell when it’s time to replace your Craftsman garage door opener battery? Here are some common signs:

  1. Weak Signal: The remote only works when you’re close to the garage.
  2. Inconsistent Operation: The remote occasionally fails to open or close the garage door.
  3. No Response: Pressing the remote’s buttons produces no action.

Recognizing these signs early can save you from unexpected inconveniences.


How To Change Craftsman Garage Door Opener Battery

Follow these straightforward steps to replace the battery in your Craftsman remote:

Step 1: Gather Your Supplies

Before starting, ensure you have:

  • The correct replacement battery (check your user manual or the existing battery).
  • A small screwdriver, if the battery compartment has screws.

Step 2: Locate the Battery Compartment

Turn the remote over to find the battery compartment. It is typically secured by a sliding cover or small screws.

Step 3: Open the Compartment

  • If there’s a screw, use the screwdriver to loosen it.
  • Gently remove the cover to access the battery.

Step 4: Remove the Old Battery

  • Carefully take out the old battery.
  • Note the battery’s orientation (positive and negative sides).

Step 5: Insert the New Battery

  • Place the replacement battery in the compartment, aligning it with the polarity markings.

Step 6: Close the Compartment

  • Replace the cover and tighten the screw if necessary.
  • Ensure the cover is secure to prevent the battery from falling out.

Step 7: Test the Remote

Press the remote button to confirm that it’s working properly.


Tips for Maintaining Your Craftsman Garage Door Opener Remote

Proper maintenance can extend the life of your remote and its battery. Here are some tips:

  1. Use High-Quality Batteries
    Invest in reliable, brand-name batteries to ensure optimal performance and longevity.
  2. Store Remotes in Safe Conditions
    Avoid exposing the remote to extreme heat, cold, or moisture, which can damage the battery.
  3. Keep Spare Batteries on Hand
    Having spare batteries ensures you’re prepared when replacement is necessary.
  4. Regularly Test the Remote
    Periodic checks can help you identify issues before they become inconvenient.

Common Issues When Changing Craftsman Garage Door Opener Batteries

Even with a fresh battery, you might encounter issues. Here’s how to troubleshoot common problems:

1. Remote Doesn’t Work After Replacement

  • Solution: Double-check the battery orientation and ensure it’s seated properly.
  • Solution: Clean the contacts to remove any dirt or corrosion.

2. Battery Drains Quickly

  • Cause: Low-quality batteries or environmental factors.
  • Solution: Use premium batteries and store the remote in a moderate climate.

3. Remote Loses Programming

  • Cause: Some models may lose their connection to the garage door opener after a battery change.
  • Solution: Refer to the user manual to reprogram the remote.

Frequently Asked Questions About Changing Craftsman Garage Door Opener Batteries

1. How Often Should I Change the Battery?

Most batteries last 1-2 years, depending on usage. Replace the battery as soon as you notice performance issues.

2. Can I Use Rechargeable Batteries?

Rechargeable batteries are generally not recommended as they may not provide consistent voltage.

3. What If My Remote Still Doesn’t Work?

If a fresh battery doesn’t solve the problem, inspect the remote for physical damage or consult a professional.

4. How Do I Find the Correct Battery Type?

The battery type is usually printed inside the battery compartment or mentioned in the user manual.


Where to Buy Craftsman Garage Door Opener Batteries

You can purchase replacement batteries from:

  1. Local Retailers: Stores like Home Depot, Walmart, and Lowe’s.
  2. Online Platforms: Websites like Amazon and eBay offer a wide selection.
  3. Craftsman’s Official Website: Find genuine replacement parts directly from the manufacturer.

Why Proper Battery Maintenance Matters

Replacing the battery in your Craftsman garage door opener remote isn’t just about convenience—it’s also about protecting your investment. Proper maintenance ensures:

  • Consistent Performance: Avoids lag or failure when operating your garage door.
  • Increased Security: Prevents unauthorized access due to a malfunctioning remote.
  • Longevity: Protects the internal components of your remote from strain.

Conclusion

Knowing how to change Craftsman garage door opener battery is a simple but essential skill for every homeowner. By following the steps outlined in this guide, you can quickly replace your remote’s battery and restore its functionality.

With a little preparation and maintenance, your Craftsman remote will serve you reliably for years. Invest in quality batteries, recognize when it’s time for a replacement, and address common issues promptly to ensure uninterrupted convenience.

Craftsman Garage Door Opener Battery Replacement 41B822: Everything You Need to Know

Craftsman Garage Door Opener Battery Replacement 41B822

Your Craftsman garage door opener remote is a key part of your daily routine, and ensuring it functions reliably is essential. One of the most common maintenance tasks is replacing the battery. In this article, we’ll explore the Craftsman Garage Door Opener Battery Replacement 41B822, providing detailed instructions, tips, and insights to help you complete the process effortlessly.

Craftsman Garage Door Opener Battery Replacement 41B822

Why Focus on the Craftsman Garage Door Opener Battery Replacement 41B822?

The 41B822 battery is a critical component of specific Craftsman garage door opener systems. Understanding its importance ensures your remote operates effectively, avoiding the frustration of being unable to access your garage.

Read too: Craftsman Garage Door Opener Troubleshooting Won’t Close: Quick Fixes and Solutions

Key reasons to replace the battery include:

  1. Extended Functionality: A fresh battery ensures your remote performs as expected.
  2. Reduced Downtime: Proactive replacement prevents interruptions.
  3. Enhanced Security: A functional remote ensures secure access to your property.

Understanding the Craftsman Garage Door Opener Battery Replacement 41B822

The 41B822 is a 12-volt alkaline battery commonly used in various Craftsman remotes. Its compact size and reliable performance make it a popular choice for homeowners. Here are its specifications:

  • Voltage: 12 volts
  • Battery Type: Alkaline
  • Compatibility: Used in Craftsman models requiring a 41B822 battery

Knowing these details ensures you purchase the correct replacement, avoiding compatibility issues.


Signs You Need a Craftsman Garage Door Opener Battery Replacement 41B822

It’s crucial to recognize when your remote’s battery is nearing the end of its life. Common indicators include:

  1. Weak Signal Range: You need to be closer to the garage for the remote to work.
  2. Intermittent Operation: The door sometimes responds and sometimes doesn’t.
  3. Unresponsive Remote: Pressing the button yields no action, even after several attempts.

Replacing the battery promptly can save you from unnecessary inconvenience.


How to Perform a Craftsman Garage Door Opener Battery Replacement 41B822

Replacing the battery in your Craftsman garage door opener remote is a straightforward task. Here’s a step-by-step guide:

Step 1: Gather the Required Tools

You’ll need:

  • A replacement 41B822 battery
  • A small screwdriver, if your remote has screws securing the battery compartment

Step 2: Locate the Battery Compartment

  1. Flip the remote to locate the battery compartment.
  2. If there’s a screw, use the screwdriver to loosen it. Otherwise, gently pry open the cover.

Step 3: Remove the Old Battery

  • Carefully extract the old battery.
  • Take note of the battery’s orientation (positive and negative sides).

Step 4: Insert the New 41B822 Battery

  • Align the new battery according to the polarity markings in the compartment.
  • Ensure the battery is securely seated to maintain a stable connection.

Step 5: Close the Battery Compartment

  • Replace the cover and secure it with the screw, if applicable.

Step 6: Test the Remote

Press the remote’s button to confirm it operates the garage door as expected.


Tips for Optimal Performance After Battery Replacement

To ensure your newly replaced battery performs well, consider the following tips:

  1. Use High-Quality Batteries: Invest in a trusted brand to ensure longevity and reliability.
  2. Store Spares Properly: Keep spare batteries in a cool, dry place to maintain their charge.
  3. Avoid Extreme Temperatures: Exposing the remote to heat or cold can affect battery life.
  4. Regularly Test Your Remote: Periodic checks can help you identify issues early.

Common Issues with Craftsman Garage Door Opener Battery Replacement 41B822

After replacing the battery, you may encounter a few challenges. Here’s how to address them:

1. Remote Doesn’t Work After Replacement

  • Check Battery Orientation: Ensure the battery is installed with the correct polarity.
  • Inspect Contacts: Clean the battery contacts to remove dirt or corrosion.

2. Short Battery Lifespan

  • Cause: Using a low-quality battery or frequent use.
  • Solution: Opt for premium brands and minimize unnecessary button presses.

3. Remote Requires Reprogramming

  • In some cases, the remote may lose its connection with the garage door opener after a battery change. Consult your user manual to reprogram it.

Benefits of Using the Correct Battery

Choosing the correct Craftsman Garage Door Opener Battery Replacement 41B822 ensures:

  • Consistent Performance: The remote operates smoothly without lag.
  • Extended Lifespan: The battery lasts longer, reducing replacement frequency.
  • Compatibility: Avoids potential damage to the remote from using incorrect battery types.

Where to Buy the Craftsman Garage Door Opener Battery Replacement 41B822

You can purchase the 41B822 battery from various sources:

1. Local Retail Stores

Stores like Home Depot, Lowe’s, and Walmart typically stock 12-volt alkaline batteries.

2. Online Retailers

Platforms like Amazon and eBay offer a wide selection of compatible batteries, often with quick shipping options.

3. Craftsman Official Website

Craftsman’s website provides genuine replacement parts, including the 41B822 battery.


FAQs About Craftsman Garage Door Opener Battery Replacement 41B822

1. How Long Does the 41B822 Battery Last?

The battery typically lasts 1-2 years, depending on usage.

2. Can I Use a Different Battery?

It’s recommended to stick with the 41B822 to avoid compatibility and performance issues.

3. What If My Remote Still Doesn’t Work After Replacement?

Double-check the battery’s orientation and clean the contacts. If the issue persists, reprogram the remote or consult a professional.

4. Are There Rechargeable Options?

Rechargeable batteries are not recommended for this model as they may not provide consistent voltage.


Conclusion

Understanding and performing a Craftsman Garage Door Opener Battery Replacement 41B822 is a vital skill for homeowners. By following the steps outlined in this guide, you can ensure your remote remains functional, saving time and frustration.

Investing in high-quality batteries, maintaining your remote properly, and addressing issues promptly will help you maximize the lifespan of your Craftsman garage door opener. With a little preparation, you’ll never be caught off guard by a dead remote again.

Craftsman Garage Door Opener Battery Type: A Comprehensive Guide for Homeowners

Craftsman Garage Door Opener Battery Type

If you own a Craftsman garage door opener, understanding the Craftsman garage door opener battery type that your remote requires is essential. A functional remote ensures seamless access to your garage, enhancing convenience and security. This guide will delve into the different battery types compatible with Craftsman garage door openers, how to identify the correct one, and tips for maintenance and replacement.

Craftsman Garage Door Opener Battery Type

Why Knowing the Craftsman Garage Door Opener Battery Type Matters

A garage door opener remote is an indispensable tool for many homeowners. However, when the battery runs out, you might find yourself locked out or struggling with manual operations. Choosing the correct Craftsman garage door opener battery type ensures:

  1. Optimal Performance: The remote works reliably with the right battery.
  2. Longer Lifespan: Using the correct type reduces strain on the remote and extends its longevity.
  3. Convenience: Knowing the type in advance allows you to keep a spare on hand, preventing downtime.

Read too: Craftsman Garage Door Opener Troubleshooting Won’t Close: Quick Fixes and Solutions


Types of Batteries Used in Craftsman Garage Door Openers

Craftsman garage door openers generally use two main categories of batteries:

1. Coin-Cell Batteries

These are small, round batteries often used in compact remotes. The most common types include:

  • CR2032: A widely used 3-volt battery.
  • CR2016: Slightly thinner than the CR2032, often used in ultra-slim remotes.

2. Alkaline Batteries

Certain Craftsman models use AA or AAA batteries. These are typically found in larger remotes or wall-mounted keypads.


How to Identify the Correct Craftsman Garage Door Opener Battery Type

To determine the exact battery type your Craftsman remote requires:

1. Check the User Manual

The user manual that comes with your garage door opener will specify the required battery type.

2. Inspect the Remote

Open the battery compartment of your remote. Most remotes have the battery type printed inside or on the back cover.

3. Visit the Craftsman Website

Craftsman provides detailed information about their products online, including replacement parts like batteries.

4. Contact Customer Support

If you’re unsure, reach out to Craftsman customer service for guidance.


Replacing the Battery: Step-by-Step Guide

Once you’ve identified the correct Craftsman garage door opener battery type, follow these steps to replace it:

1. Gather Necessary Tools

You’ll typically need the replacement battery and a small screwdriver (if your remote has screws).

2. Open the Battery Compartment

  • Locate the battery compartment at the back of the remote.
  • Use a screwdriver or your fingers to gently open it.

3. Remove the Old Battery

  • Carefully take out the old battery.
  • Note the orientation (positive and negative sides) before removing it.

4. Insert the New Battery

  • Place the new battery in the compartment, aligning it with the correct polarity.

5. Close the Compartment

Secure the cover tightly to protect the battery.

6. Test the Remote

Press the button to ensure the remote is functioning properly.


Common Issues Related to Craftsman Garage Door Opener Batteries

Even after replacing the battery, you may encounter issues. Here are common problems and their solutions:

1. Remote Doesn’t Work After Replacement

  • Solution: Double-check the battery orientation and ensure it is seated properly.
  • Solution: Clean the battery contacts with a dry cloth to remove dirt or corrosion.

2. Short Battery Life

  • Cause: Using a low-quality battery or leaving the remote exposed to extreme temperatures.
  • Solution: Opt for high-quality, brand-recommended batteries and store the remote in a temperate environment.

3. Lost Programming

  • Cause: Some remotes lose their programming after a battery change.
  • Solution: Reprogram the remote following the instructions in your user manual.

How to Extend the Life of Your Garage Door Opener Battery

Proper care and maintenance can help prolong the life of your Craftsman garage door opener battery type.

1. Store Remotes Properly

Avoid exposing your remote to moisture, extreme heat, or cold.

2. Minimize Button Pressing

Unnecessary button presses can drain the battery faster.

3. Use High-Quality Batteries

Invest in reliable batteries to avoid frequent replacements.

4. Replace Batteries Promptly

A weak battery can strain the remote’s circuitry, causing premature failure.


Craftsman Garage Door Opener Battery Type Compatibility

Craftsman designs their remotes with compatibility in mind, ensuring that replacement batteries are widely available. Here’s a quick compatibility chart:

Remote ModelBattery Type
Craftsman 315MHz RemoteCR2032
Craftsman Wall-Mounted KeypadAA Alkaline
Craftsman 390MHz RemoteCR2016

Where to Buy Craftsman Garage Door Opener Batteries

You can purchase replacement batteries for your Craftsman remote at the following locations:

  1. Local Retailers: Stores like Walmart, Home Depot, or Lowe’s.
  2. Online Retailers: Amazon and eBay offer a variety of compatible batteries.
  3. Specialized Electronics Stores: These stores often carry a range of batteries, including CR2032 and CR2016.

FAQs About Craftsman Garage Door Opener Battery Type

1. How Often Should I Replace the Battery?

Most batteries last 1-2 years, depending on usage frequency.

2. Can I Use Rechargeable Batteries?

Rechargeable batteries are not recommended as they may not provide consistent voltage.

3. What Should I Do If My Remote Stops Working Suddenly?

Check the battery first and replace it if necessary. If the issue persists, consult the user manual or contact customer support.

4. Are Craftsman Batteries Universal?

Not all Craftsman remotes use the same battery type. Refer to your remote’s specifications for accurate information.


Conclusion

Understanding the Craftsman garage door opener battery type your remote requires is key to maintaining its functionality and ensuring seamless access to your garage. By identifying the correct battery, replacing it as needed, and following proper maintenance practices, you can avoid unnecessary disruptions and extend the lifespan of your device.

Keeping a spare battery on hand and being prepared to replace it ensures your Craftsman garage door opener remains a reliable tool in your daily routine.

How to Perform a Sears Craftsman Garage Door Opener Battery Replacement with Ease

Sears Craftsman Garage Door Opener Battery Replacement

Your garage door opener is a crucial component of your daily routine, ensuring seamless access to and from your home. However, like any battery-powered device, the remote for your Sears Craftsman garage door opener will eventually require a battery replacement. This article will guide you through the Sears Craftsman garage door opener battery replacement process step-by-step, ensuring you can restore your remote’s functionality effortlessly.

Sears Craftsman Garage Door Opener Battery Replacement

Why Replace Your Sears Craftsman Garage Door Opener Battery?

A weak or dead battery in your garage door opener remote can be inconvenient and disrupt your day-to-day activities. While these batteries are designed to last for a long time, they do eventually wear out. Indicators that it’s time to replace your battery include:

  1. Decreased Range: You need to stand closer to the garage door for the remote to work.
  2. Intermittent Functionality: The door sometimes responds and sometimes doesn’t.
  3. No Response at All: Pressing the remote button produces no result.

Replacing the battery promptly will restore the convenience and functionality of your garage door opener, avoiding any unnecessary frustration.

Read too: Craftsman Garage Door Opener Troubleshooting Won’t Close: Quick Fixes and Solutions


Tools and Materials Needed

Before starting, gather the necessary items to perform the Sears Craftsman garage door opener battery replacement smoothly:

  • Replacement Battery: Check your remote’s user manual for the correct battery type (commonly CR2032 or similar coin-cell batteries).
  • Small Screwdriver: A Phillips or flathead screwdriver is often required to access the battery compartment.
  • Clean Cloth or Gloves: To handle the battery without leaving fingerprints or residue.

How to Perform Sears Craftsman Garage Door Opener Battery Replacement

Follow these step-by-step instructions to replace the battery in your Sears Craftsman garage door opener remote:

1. Identify the Correct Battery Type

Begin by identifying the specific battery required for your remote. You can usually find this information in the user manual or printed inside the remote’s battery compartment.

2. Open the Battery Compartment

  • Locate the Battery Cover: Look for a small slot or screws securing the battery compartment on the back of the remote.
  • Use the Screwdriver if Needed: Gently unscrew or pry open the cover using the appropriate tool.

3. Remove the Old Battery

Carefully take out the old battery using your fingers or a small non-metallic tool to avoid damaging the compartment. Pay attention to how the battery is oriented (positive and negative sides) to ensure correct placement of the new one.

4. Insert the New Battery

  • Align the new battery with the markings inside the compartment to match the polarity.
  • Place the battery securely in its slot, ensuring it is seated properly for optimal functionality.

5. Close the Battery Compartment

Replace the cover and secure it using the screws or by snapping it back into place. Make sure it’s closed tightly to protect the battery from dirt and moisture.

6. Test the Remote

Press the button on your remote to check if it operates the garage door opener. If the door responds, the battery replacement was successful.


Common Issues After Battery Replacement

If your remote doesn’t work after replacing the battery, consider the following troubleshooting steps:

  1. Recheck Battery Placement: Ensure the battery is installed correctly with the right polarity.
  2. Inspect the Contacts: Clean any dirt or corrosion from the battery contacts using a dry cloth.
  3. Reprogram the Remote: In rare cases, you may need to reprogram the remote to sync it with the garage door opener.

Tips for Maintaining Your Sears Craftsman Garage Door Opener Remote

  1. Keep a Spare Battery on Hand: Avoid interruptions by having a replacement battery readily available.
  2. Regular Testing: Periodically check the functionality of your remote to catch battery issues early.
  3. Store Remotes Properly: Avoid exposing the remote to extreme temperatures or moisture, which can reduce battery life.

When to Call a Professional

While replacing a battery is straightforward, there might be underlying issues if your remote still doesn’t work after following the above steps. In such cases, it’s best to contact a professional technician who can inspect the remote and the garage door opener system.


FAQs About Sears Craftsman Garage Door Opener Battery Replacement

1. How Long Do Garage Door Opener Batteries Last?

Most garage door opener remote batteries last 1-2 years, depending on usage frequency.

2. Can I Use a Generic Battery?

Yes, as long as the battery matches the required specifications, generic brands will work.

3. What If I Lose My Remote?

You can purchase a replacement remote compatible with your Sears Craftsman opener and program it to work with your system.

4. Are Battery Replacements Covered Under Warranty?

Battery replacements are usually considered routine maintenance and may not be covered under warranty.


Conclusion

Performing a Sears Craftsman garage door opener battery replacement is a simple task that can save you time and restore the convenience of your garage door system. With the right tools and steps outlined above, you can complete this maintenance efficiently. Regular care and timely battery replacements will keep your garage door opener functioning seamlessly for years to come.

Sears Craftsman Garage Door Opener Battery: Replacement, Maintenance, and More

Sears Craftsman Garage Door Opener Battery

The Sears Craftsman Garage Door Opener Battery is an essential component that keeps your garage door opener functioning, especially during power outages. With power failures being unpredictable, having a reliable backup battery in your Craftsman opener ensures that you can still operate your garage door without interruption. Whether you’re dealing with a power outage, needing a replacement battery, or looking to improve your garage door opener’s reliability, this article covers everything you need to know about the Sears Craftsman Garage Door Opener Battery.

Sears Craftsman Garage Door Opener Battery

In this comprehensive guide, we’ll explore the role of the battery, how to choose the correct one, installation and maintenance tips, and troubleshooting advice for common issues. By the end of this article, you’ll have all the information you need to ensure your Sears Craftsman Garage Door Opener Battery works reliably for years to come.


The Role of the Sears Craftsman Garage Door Opener Battery

The Sears Craftsman Garage Door Opener Battery serves as a backup power source for your garage door opener. This is especially critical during power outages when the opener would otherwise be unable to function. The battery ensures that the garage door continues to operate smoothly, providing convenience and security for your home.

1. Power Backup in Emergencies

During a power outage, your Sears Craftsman Garage Door Opener Battery provides backup power to operate the door. Whether you’re coming home to an empty driveway or need to leave in a hurry, you won’t be stranded outside if your garage door opener is equipped with a working battery. It allows you to open and close the garage door just as you would with regular power.

Read too: Craftsman Garage Door Opener Troubleshooting Won’t Close: Quick Fixes and Solutions

2. Increased Convenience

Having a functioning Sears Craftsman Garage Door Opener Battery allows you to enjoy the convenience of automatic door operation, even without main power. In cases where your main electrical power is cut off, having battery backup means that your garage door can still open with the press of a button, without having to manually lift the door.

3. Security Assurance

A working battery in your garage door opener is also a security measure. When you can still operate the door during an outage, you avoid leaving your garage unsecured. This is particularly important for protecting valuable items stored in the garage or for keeping your home safe from unwanted intrusions.


How to Choose the Right Sears Craftsman Garage Door Opener Battery

Choosing the correct Sears Craftsman Garage Door Opener Battery is vital to ensure that your garage door opener functions properly. Here are some important factors to consider when selecting the right battery:

1. Identify Your Garage Door Opener Model

Before purchasing a new battery, it’s essential to identify the model of your Sears Craftsman Garage Door Opener. Different models require different battery types, and it’s important to match the battery specifications with the opener’s requirements. This information is usually available on the label of the opener or in the owner’s manual.

2. Choosing Between Lead-Acid and Lithium-Ion Batteries

Sears Craftsman Garage Door Openers typically use either lead-acid or lithium-ion batteries. Both types have pros and cons:

  • Lead-Acid Batteries: These are commonly used for Craftsman garage door openers due to their affordability. They are reliable and have a reasonable lifespan, but they tend to be bulkier and heavier. They may also require more maintenance than lithium-ion batteries.
  • Lithium-Ion Batteries: Lithium-ion batteries are more compact, efficient, and have a longer lifespan. They are also quicker to recharge, but they come at a higher cost. For those who want less maintenance and a longer-lasting solution, lithium-ion is often the better choice.

3. Battery Capacity (Amp-Hour Rating)

Another factor to consider is the amp-hour (Ah) rating of the battery. The amp-hour rating refers to the battery’s capacity to store and deliver energy. A higher Ah rating means the battery will last longer during a power outage. However, ensure that the chosen battery’s Ah rating matches the requirements of your Craftsman garage door opener.


Installing the Sears Craftsman Garage Door Opener Battery

Installing a new Sears Craftsman Garage Door Opener Battery is a simple process that most homeowners can perform themselves. However, always make sure to turn off the power supply to the opener before starting the installation to ensure your safety.

1. Turn Off the Power

Before beginning the installation, disconnect the garage door opener from the main power supply to prevent any electrical accidents during the process.

2. Locate the Battery Compartment

The battery compartment in most Sears Craftsman Garage Door Openers is located on the back or underside of the unit. If you are unsure where to find the battery, consult the owner’s manual for precise instructions.

3. Remove the Old Battery

If you are replacing an old battery, carefully disconnect the terminals from the battery, noting the correct orientation. It’s important to connect the positive terminal to the positive side and the negative terminal to the negative side of the new battery.

4. Install the New Battery

Once the old battery is removed, insert the new Sears Craftsman Garage Door Opener Battery into the compartment. Ensure that the battery fits snugly and that the terminals are connected correctly.

5. Test the Garage Door Opener

Once the new battery is installed, reconnect the power to the opener and test its functionality. Open and close the garage door several times to ensure that it’s working correctly. Test the remote control and safety features to make sure everything is functioning properly.


How to Maintain Your Sears Craftsman Garage Door Opener Battery

Proper maintenance is key to extending the life of your Sears Craftsman Garage Door Opener Battery. Here are some maintenance tips to help you keep your opener running efficiently:

1. Regular Inspections

Regularly inspect your garage door opener battery for signs of damage, wear, or leakage. Check for corrosion around the terminals, as this can hinder the battery’s performance. Clean the terminals using a cloth if needed.

2. Test the Battery Periodically

Test the Sears Craftsman Garage Door Opener Battery periodically by disconnecting the main power and ensuring the opener still works. This will help identify potential issues early, preventing unexpected failures during a power outage.

3. Avoid Deep Discharge and Overcharging

Ensure that you avoid allowing the battery to fully discharge, as deep discharges can shorten its lifespan. Likewise, overcharging can also be detrimental to the battery. Follow the manufacturer’s instructions on charging times and avoid overcharging the battery.

4. Replace the Battery When Needed

Typically, the Sears Craftsman Garage Door Opener Battery lasts 3 to 5 years, depending on usage. If you notice a decrease in performance or if the battery is no longer holding a charge, it’s time to replace it.


Troubleshooting Common Issues with Sears Craftsman Garage Door Opener Battery

If your Sears Craftsman Garage Door Opener Battery is malfunctioning, you may encounter issues such as the garage door not opening or closing during a power failure. Here are some troubleshooting tips:

1. Garage Door Opener Won’t Work During Power Outage

If the opener doesn’t function during a power outage, the battery may be dead or improperly connected. Inspect the battery and terminals, ensuring that they are correctly installed. If the battery is old, consider replacing it.

2. Battery Drains Quickly

If the battery is draining too quickly, it may be defective or nearing the end of its lifespan. A lead-acid battery may need to be replaced after 3 to 5 years, while lithium-ion batteries often last longer. If the battery is new and still draining quickly, check for faulty wiring or other issues.

3. Remote Control Not Working

If the remote control stops working during a power outage, check the battery in the remote. Replace it with a new one if necessary. If the remote still isn’t functioning, inspect the opener’s battery to ensure proper power flow.


Conclusion: Keeping Your Sears Craftsman Garage Door Opener Battery in Top Shape

The Sears Craftsman Garage Door Opener Battery is essential for ensuring the reliability and functionality of your garage door opener, especially during power outages. By selecting the right battery, installing it correctly, maintaining it properly, and troubleshooting common issues, you can keep your opener in good condition for years.

Always remember that regular testing, inspection, and timely replacement are keys to maintaining optimal performance and avoiding inconvenient breakdowns when you need your garage door opener the most.

Craftsman Garage Door Opener Battery 12V: Maintenance, Replacement, and More

Craftsman Garage Door Opener Battery 12V

When it comes to ensuring your garage door operates smoothly and reliably, the Craftsman Garage Door Opener Battery 12V plays a crucial role. This battery provides backup power, allowing your garage door opener to function during a power outage. Without it, you might find yourself unable to open or close the garage door in times of need, which can be inconvenient and frustrating.

Craftsman Garage Door Opener Battery 12V

In this article, we will explore everything you need to know about the Craftsman Garage Door Opener Battery 12V, including its role, how to choose the right one, installation tips, and maintenance advice. Whether you’re new to garage door openers or simply looking for more information, this guide will ensure that you fully understand the importance of this 12V battery and how to keep your garage door opener working at its best.

The Role of the Craftsman Garage Door Opener Battery 12V

The Craftsman Garage Door Opener Battery 12V is designed to provide backup power to your garage door opener when there is a power outage. This battery ensures that you can still operate your garage door opener remotely or manually, even when the electrical grid goes down. In areas where power outages are common, having a working 12V battery is essential for maintaining both convenience and security.

Read too: Craftsman Garage Door Opener Troubleshooting Won’t Close: Quick Fixes and Solutions

1. Power Backup During Outages

The main role of the Craftsman Garage Door Opener Battery 12V is to supply power during times when your main power source is unavailable. Without a reliable backup battery, your garage door opener would become completely inoperative when the power goes out, making it difficult to access or secure your garage. Having a 12V battery ensures that you won’t be left stranded, whether you’re trying to leave your home or return during an outage.

2. Security and Convenience

Besides ensuring that the garage door opens during a power failure, a Craftsman Garage Door Opener Battery 12V also contributes to the convenience and security of your home. Many Craftsman openers are equipped with remote control capabilities, meaning you can open and close the door from your vehicle without getting out. The 12V battery ensures that this function works smoothly, even when there’s no power in the home.

3. Automatic Closing Features

Some Craftsman garage door openers have an automatic closing feature that requires a battery to function. This ensures that after you drive away, the door will close automatically, keeping your home safe and secure. With a Craftsman Garage Door Opener Battery 12V, you can enjoy these added security features, even during power outages.

How to Choose the Right Craftsman Garage Door Opener Battery 12V

Choosing the correct Craftsman Garage Door Opener Battery 12V is crucial to ensure your garage door opener functions properly and remains reliable during power outages. Several factors need to be considered when selecting the right battery, including the specific requirements of your Craftsman model and the type of battery that fits your needs.

1. Check Your Craftsman Opener Model

Before purchasing a new Craftsman Garage Door Opener Battery 12V, you should first check the model number of your garage door opener. Different Craftsman models require different types of batteries, and it’s essential to match the battery specifications with your opener. This information can typically be found on the opener itself or in the owner’s manual.

2. Choose Between Lead-Acid and Lithium-Ion Batteries

There are generally two types of 12V batteries available for Craftsman garage door openers: lead-acid and lithium-ion. Each has its benefits:

  • Lead-Acid Batteries: These are more affordable and commonly used in Craftsman garage door openers. They are reliable, widely available, and provide decent backup power for most systems. However, they tend to have a shorter lifespan compared to lithium-ion batteries.
  • Lithium-Ion Batteries: Lithium-ion batteries are more expensive but offer a longer lifespan and faster recharge time compared to lead-acid batteries. They are also more compact and efficient, which can be an advantage if space is limited.

When selecting a Craftsman Garage Door Opener Battery 12V, consider your budget, space availability, and how long you want the battery to last.

3. Consider Battery Capacity (Amp-Hour Rating)

The capacity of a battery is measured in amp-hours (Ah), which indicates how much power the battery can provide over time. A higher Ah rating generally means longer backup power during a power outage. For example, a 12V 7Ah battery will provide power for a shorter period than a 12V 9Ah battery. Check your opener’s specifications to find out which capacity is ideal for your model.

How to Install a Craftsman Garage Door Opener Battery 12V

Installing the Craftsman Garage Door Opener Battery 12V is a relatively simple task that can be done by most homeowners. However, always make sure to follow the safety guidelines outlined in your owner’s manual. Here are the basic steps for installation:

1. Turn Off the Power

Before beginning any installation, ensure that the power to the garage door opener is turned off. This is crucial for preventing electrical accidents during the installation process.

2. Locate the Battery Compartment

The battery compartment is typically located on the back or bottom of the opener unit. Refer to the owner’s manual if you’re unsure of its exact location.

3. Remove the Old Battery

If you are replacing an old Craftsman Garage Door Opener Battery 12V, carefully disconnect the battery from the terminals. Take note of the battery’s orientation to ensure proper installation of the new battery.

4. Install the New Battery

Insert the new Craftsman Garage Door Opener Battery 12V into the compartment, making sure to connect the terminals correctly—positive to positive and negative to negative. Ensure that the battery is securely placed and doesn’t move.

5. Test the Opener

Once the new battery is installed, plug the garage door opener back into the power supply and test the door’s functionality. Ensure that it opens and closes correctly, and check the remote control’s operation as well.

How to Maintain Your Craftsman Garage Door Opener Battery 12V

Maintaining your Craftsman Garage Door Opener Battery 12V is essential for ensuring its longevity and reliability. Here are some tips to help you keep your battery in top condition:

1. Regular Inspections

Inspect the battery regularly for signs of wear or damage. Look for corrosion around the terminals, which could cause issues with the battery’s performance. Clean the terminals if necessary using a cloth or brush.

2. Test the Battery Periodically

Test the battery by disconnecting the opener from the power supply and checking if it still operates the door. This will help you determine if the battery is still functional and provide an early warning if it needs replacement.

3. Avoid Overcharging or Deep Discharge

Ensure the battery is properly charged without overcharging. Overcharging can damage the battery and reduce its lifespan. Similarly, try to avoid deep discharge (allowing the battery to fully drain), as this can also shorten its life.

4. Replace Battery When Needed

Most Craftsman Garage Door Opener Battery 12V models last for 3-5 years, depending on usage and maintenance. If you notice decreased performance or if the battery is no longer holding a charge, it’s time to replace it.

Troubleshooting Common Issues with Craftsman Garage Door Opener Battery 12V

Sometimes, you may face issues with your Craftsman Garage Door Opener Battery 12V. Here are some common problems and how to resolve them:

1. Garage Door Won’t Open During Power Outage

If your garage door opener isn’t working during a power outage, it could be due to a dead or improperly connected battery. Double-check the connections and ensure the battery is charged.

2. Battery Drains Too Quickly

If your battery is draining too quickly, it may be nearing the end of its lifespan, or it could be due to overuse. In this case, replacing the battery with a new Craftsman Garage Door Opener Battery 12V should solve the problem.

3. Remote Control Issues

If the remote control isn’t working during a power outage, it may be due to a weak or drained battery. Try replacing the remote’s battery and testing it again.

Conclusion: Ensuring Optimal Performance with the Craftsman Garage Door Opener Battery 12V

The Craftsman Garage Door Opener Battery 12V is an essential component for ensuring that your garage door opener continues to function smoothly, especially during power outages. By choosing the right battery, properly installing it, and maintaining it regularly, you can extend the life of your opener and enjoy uninterrupted access to your garage. Keep the above tips in mind for troubleshooting, installation, and maintenance, and your garage door opener will be ready whenever you need it.

Craftsman Garage Door Opener Battery Size: A Comprehensive Guide

Craftsman Garage Door Opener Battery Size

When it comes to maintaining a smooth-running garage door, one of the most critical components is the Craftsman garage door opener battery size. This battery ensures that your garage door opener continues to function properly, even during power outages. A well-maintained battery guarantees you can still use your opener remotely and maintain the security of your home. In this article, we will delve into the importance of Craftsman garage door opener battery size, how to choose the right one, and tips for maintaining and replacing it when necessary.

Craftsman Garage Door Opener Battery Size

The Role of the Battery in a Craftsman Garage Door Opener

Before we dive into Craftsman garage door opener battery size, it’s essential to understand the role of the battery in the system. The garage door opener battery is crucial for providing backup power during a power outage, ensuring that the opener continues to work when there is no electricity. Without this battery, you would be left with a non-functional garage door during an outage, potentially compromising the security and convenience of your home.

1. Backup Power for Your Garage Door Opener

The battery ensures that you can still operate your garage door opener even if the power goes out. Whether you are entering or exiting your garage during a storm or unexpected power failure, the battery ensures that your garage door will open or close properly.

2. Automatic Closing Features

Many modern Craftsman garage door openers are designed with an automatic closing feature that requires battery power to function. The battery ensures the door remains operational during power loss, keeping your property secure.

Read too: Craftsman Garage Door Opener Troubleshooting Won’t Close: Quick Fixes and Solutions

3. Remote Operation and Convenience

Your Craftsman garage door opener likely comes with a remote control. The battery enables the remote control feature, allowing you to open or close the garage door without getting out of your car. This is especially convenient during inclement weather.

Understanding Craftsman Garage Door Opener Battery Size

Craftsman garage door opener battery size refers to the specific type of battery needed to provide the required power for your garage door opener system. Getting the right battery size is essential for your opener’s performance. If you use the wrong battery size, it could lead to malfunctioning, insufficient backup power, or failure to work during a power outage.

There are various battery sizes available, but each Craftsman opener model has specific requirements. Understanding which battery is compatible with your garage door opener ensures it will function properly when needed.

1. Common Battery Sizes for Craftsman Garage Door Openers

The most commonly used battery sizes for Craftsman garage door openers are:

  • 12V Lead-Acid Batteries: These are the standard for most garage door openers. Lead-acid batteries are affordable, widely available, and provide reliable power.
  • 12V Lithium-Ion Batteries: Lithium-ion batteries are a more modern alternative, offering a longer lifespan and faster recharge times compared to lead-acid batteries.
  • 6V and 12V Alkaline Batteries: Some models of Craftsman garage door openers use alkaline batteries for their backup power systems.

2. Battery Specifications

Each Craftsman model will have a specific Craftsman garage door opener battery size requirement. These specifications can be found in the owner’s manual or on the manufacturer’s website. It is important to choose a battery that matches these specifications in terms of size, voltage, and power capacity.

For example, a Craftsman garage door opener might require a 12V lead-acid battery with a specific amp-hour rating to provide adequate backup power. A larger battery with a higher amp-hour rating will typically provide longer backup power, but it’s essential to use the battery size recommended by the manufacturer.

3. Why Battery Size Matters

The battery size directly impacts the performance of your garage door opener. If the battery is too small or too large for the system, it can lead to:

  • Insufficient Backup Power: A battery that’s too small may not provide enough power to operate the opener during an outage, leaving you without access to your garage.
  • Overcharging or Undercharging: Using a battery that isn’t designed for your Craftsman opener can cause overcharging or undercharging, reducing the battery’s lifespan and performance.
  • Potential Damage: The wrong battery size can cause damage to the opener’s internal electronics, leading to costly repairs.

How to Choose the Right Craftsman Garage Door Opener Battery Size

Choosing the right Craftsman garage door opener battery size is critical to maintaining the efficiency and longevity of your garage door opener system. Here are some important considerations when selecting a new battery:

1. Check the Model Number of Your Garage Door Opener

Before purchasing a new battery, make sure to note your Craftsman garage door opener’s model number. This will help you find the specific battery size that is compatible with your opener. If you cannot find the model number on the opener, refer to the owner’s manual for assistance.

2. Consult the Manufacturer’s Specifications

The owner’s manual or the Craftsman website will provide the battery specifications for your opener model. These specifications include the required voltage, amp-hour rating, and battery type. It is essential to follow these recommendations to ensure proper compatibility.

3. Consider the Battery Type

As mentioned earlier, Craftsman garage door openers use either lead-acid or lithium-ion batteries. The type of battery you choose will depend on factors like budget, desired battery lifespan, and charging time. Lead-acid batteries are affordable and work well for most models, but lithium-ion batteries are more durable and typically have a longer lifespan.

4. Choose the Correct Voltage

Ensure that the voltage of the new battery matches the voltage specified by the manufacturer. Using a higher voltage battery can damage your opener, while using a lower voltage battery may not provide enough power.

5. Consider Battery Capacity (Amp-Hour Rating)

The amp-hour (Ah) rating determines the capacity of the battery and how long it will last during a power outage. If you want extended backup power, look for a battery with a higher amp-hour rating. However, keep in mind that a larger capacity battery might be bulkier or more expensive.

6. Installation and Maintenance Requirements

Once you’ve selected the right battery, make sure you’re comfortable with the installation process. Some batteries come with easy-to-follow instructions, while others may require professional installation. Additionally, consider the battery’s maintenance requirements—some batteries require regular checks to ensure optimal performance.

How to Replace Your Craftsman Garage Door Opener Battery

Replacing the Craftsman garage door opener battery size is a relatively straightforward process that you can do yourself. Here’s a simple guide:

1. Turn Off Power to the Opener

Before beginning the replacement process, ensure the opener is powered off to avoid any electrical hazards.

2. Locate the Battery Compartment

The battery compartment is typically located on the back or bottom of the garage door opener. Check the user manual to locate it if you’re unsure.

3. Remove the Old Battery

Disconnect the old battery by carefully removing the battery terminals. Make sure to handle the battery with care and dispose of it properly.

4. Install the New Battery

Place the new Craftsman garage door opener battery size into the compartment, connecting the terminals securely. Ensure the battery fits correctly, with the positive and negative terminals in the right orientation.

5. Test the Opener

Once the battery is installed, plug the opener back in and test the remote control and wall switch to ensure everything is working properly. If everything works as expected, the installation is complete.

How to Maintain Your Craftsman Garage Door Opener Battery

Maintaining your Craftsman garage door opener battery size is important to ensure that the opener remains functional and reliable for years. Here are some maintenance tips:

1. Regularly Check the Battery

Inspect the battery for signs of wear or corrosion. If you notice any corrosion around the terminals, clean it off using a cloth and a mixture of baking soda and water.

2. Test the Backup Power

Periodically test your garage door opener by disconnecting it from the power supply. Ensure the battery backup works by operating the opener using the remote or wall control.

3. Replace Batteries Before They Fail

While most batteries last several years, it’s important to replace the battery before it fails. If you notice a decline in performance, such as a slower response or reduced backup power, it’s time to replace the battery.

Conclusion: Ensure Your Craftsman Garage Door Opener Runs Smoothly

In conclusion, selecting the correct Craftsman garage door opener battery size is crucial for maintaining your garage door opener’s performance and reliability. By choosing the right size, type, and voltage, you ensure that your opener continues to operate smoothly during a power outage and provides convenient remote access. Regular maintenance and timely battery replacement will ensure that your opener stays in top condition for years to come.

Battery For A Craftsman Garage Door Opener: Everything You Need to Know

Battery For A Craftsman Garage Door Opener

Battery for a Craftsman Garage Door Opener is an essential component for homeowners who want to ensure that their garage door opener works efficiently, even during a power outage. Having a reliable battery in your garage door opener ensures that you can still operate the door manually or remotely, maintaining security and convenience for your home. In this article, we will explore everything you need to know about the battery for a Craftsman garage door opener, including how to choose the right one, when to replace it, and how to extend its lifespan.

Battery For A Craftsman Garage Door Opener

The Importance of a Battery For A Craftsman Garage Door Opener

battery for a Craftsman garage door opener plays a critical role in keeping the opener functional when the main power supply is interrupted. Without this battery, your garage door opener would only function during normal electrical conditions, which can be inconvenient in the event of a power failure.

Read too: Craftsman Garage Door Opener Troubleshooting Won’t Close: Quick Fixes and Solutions

1. Power Backup During Outages

One of the most important reasons for having a battery in your Craftsman garage door opener is to provide backup power during a power outage. If you live in an area that is prone to frequent power outages, a battery for a Craftsman garage door opener can be a lifesaver, ensuring that you can still operate your garage door even when the electricity is down.

2. Convenience and Security

Without a functional battery, you may have to rely on manual operation of the garage door, which can be cumbersome and time-consuming, especially if the door is heavy or difficult to lift. A working battery allows for seamless operation of the opener, maintaining both convenience and security.

3. Automatic Closing Feature

Another benefit of having a battery for your Craftsman garage door opener is the ability to automatically close your door even if the power is out. Many Craftsman openers are designed with an automatic closing feature that requires power to operate. Having a battery installed ensures that this feature remains functional, helping to keep your property secure.

Understanding the Different Types of Batteries for Craftsman Garage Door Openers

When it comes to choosing the right battery for a Craftsman garage door opener, there are several options available. It’s important to select the correct type of battery to ensure compatibility and optimal performance. Below are the main types of batteries commonly used for Craftsman garage door openers:

1. 12V Lead-Acid Battery

The most common type of battery used for Craftsman garage door openers is the 12V lead-acid battery. These batteries are reliable, affordable, and provide adequate power for most garage door opener models. They are typically rechargeable, and can last for several years with proper care and maintenance.

2. Lithium-Ion Battery

Some newer Craftsman garage door openers are designed to work with lithium-ion batteries. These batteries are more expensive than lead-acid batteries but offer several advantages, such as a longer lifespan and faster recharging times. Lithium-ion batteries are also more lightweight and compact, making them an attractive option for those looking for a more modern solution.

3. Gel-Cell Battery

Gel-cell batteries are another option for Craftsman garage door openers. These batteries are similar to lead-acid batteries but use a gel electrolyte instead of a liquid one. They are more durable and less prone to leaking, making them a great choice for those who live in areas with extreme temperatures or high humidity.

How to Choose the Right Battery For A Craftsman Garage Door Opener

Choosing the right battery for a Craftsman garage door opener depends on several factors. Below are some important considerations to keep in mind when selecting a battery:

1. Check the Manufacturer’s Specifications

The first step in selecting the right battery for a Craftsman garage door opener is to consult the manufacturer’s specifications for your specific model. Craftsman garage door openers come in various models, each with different battery requirements. By referencing the owner’s manual or the manufacturer’s website, you can determine the type of battery that is compatible with your opener.

2. Consider Battery Capacity

Battery capacity is an important factor to consider, as it determines how long the battery will provide power to your garage door opener during an outage. Look for a battery with sufficient capacity to ensure that the opener can function properly during a power interruption. Generally, a higher-capacity battery will offer longer backup power, but it may come at a higher price.

3. Check the Battery Life

The lifespan of the battery is another key consideration when selecting a battery for a Craftsman garage door opener. Lead-acid batteries typically last around 3-5 years, while lithium-ion batteries can last up to 10 years or more. Keep in mind that battery life can vary depending on usage and maintenance, so it’s important to replace your battery as recommended to avoid unexpected issues.

4. Choose Between Rechargeable and Non-Rechargeable Batteries

Most batteries for Craftsman garage door openers are rechargeable, meaning you can reuse them for several years before needing to replace them. However, there are also non-rechargeable batteries available, though they are less common and often more expensive in the long run. Rechargeable batteries are generally the better choice for most homeowners.

How to Install a Battery For A Craftsman Garage Door Opener

Installing a battery for a Craftsman garage door opener is a relatively simple process that can be completed in a few steps. Below is a basic guide on how to install a new battery in your opener:

1. Turn Off the Power

Before you begin, make sure to turn off the power to the garage door opener by unplugging it from the electrical outlet. This will help prevent any electrical accidents while you’re working on the unit.

2. Locate the Battery Compartment

Most Craftsman garage door openers have a battery compartment located on the back or bottom of the unit. Refer to your owner’s manual to find the exact location of the compartment.

3. Remove the Old Battery

If you’re replacing an old battery, carefully disconnect the old battery from the terminals. Remove it from the compartment, being careful not to damage any surrounding parts.

4. Install the New Battery

Insert the new battery for a Craftsman garage door opener into the compartment, ensuring that it is connected properly to the terminals. Make sure the battery is securely in place and that the connections are tight.

5. Test the Opener

Once the new battery is installed, plug the opener back in and test it to ensure that it is working correctly. Check the opener’s functions, such as opening and closing the door, to make sure everything is operating smoothly.

How to Maintain Your Battery For A Craftsman Garage Door Opener

Maintaining your battery for a Craftsman garage door opener is important to ensure long-lasting performance. Here are some tips for extending the life of your battery:

1. Keep the Battery Clean

Regularly inspect the battery terminals and keep them clean to prevent corrosion. If you notice any buildup on the terminals, use a clean cloth or a wire brush to remove it.

2. Charge the Battery Regularly

Even if you don’t experience many power outages, it’s important to keep your battery charged. Some garage door openers have a built-in charging system that will charge the battery while the opener is in use. Be sure to check that the charging system is functioning properly to keep the battery at optimal levels.

3. Test the Battery Periodically

Every few months, test your battery for a Craftsman garage door opener to ensure that it is working properly. You can do this by unplugging the opener and using the remote or wall control to open and close the door. If the door doesn’t respond, it may be time to replace the battery.

Conclusion: Ensuring Your Garage Door Opener Works When You Need It Most

Having a functional battery for a Craftsman garage door opener is crucial for ensuring that your opener works during power outages and continues to operate smoothly. By choosing the right battery, properly installing it, and maintaining it regularly, you can ensure that your garage door opener will provide reliable performance for years to come. Whether you’re dealing with a power outage or simply looking for a more convenient way to operate your garage door, investing in a quality battery is a smart choice for any homeowner.

How To Replace A Craftsman Garage Door Opener Battery: A Step-by-Step Guide

How To Replace A Craftsman Garage Door Opener Battery

Your Craftsman garage door opener is an essential part of your daily routine, providing convenience and security. However, the backup battery plays a critical role in ensuring uninterrupted operation during power outages. If you’ve noticed your opener struggling or a battery warning light blinking, it’s time to replace the battery. This article will guide you step-by-step on how to replace a Craftsman garage door opener battery, ensuring you restore its functionality with ease.

How To Replace A Craftsman Garage Door Opener Battery

Why Replacing the Battery is Important

The backup battery ensures your garage door opener works even when there’s a power outage. Over time, these batteries lose their efficiency and need replacement. Replacing the battery promptly offers several benefits:

  • Uninterrupted Access: No power? No problem! The backup keeps the opener functioning.
  • Enhanced Safety: Your garage door’s safety features, like auto-reverse, rely on the battery to work during outages.
  • Long-Term Opener Health: Avoid straining the opener’s motor by keeping a fully functioning battery installed.

Signs It’s Time to Replace the Battery

Before diving into how to replace a Craftsman garage door opener battery, you should recognize the signs that your battery is failing:

  1. Dim LED Indicators: A blinking or dim battery warning light on the opener.
  2. Reduced Performance: The opener struggles to operate smoothly during outages.
  3. Short Backup Lifespan: Fewer open-close cycles when running on battery power.
  4. Visible Damage: Swelling, leakage, or corrosion on the old battery.

Read tooo: Craftsman Garage Door Opener 1/2 HP Programming for Effortless Setup


Tools and Materials Needed

Before starting the replacement process, gather these tools and materials:

  • Screwdriver (usually Phillips-head)
  • Replacement battery (check your opener manual for specifications)
  • Clean cloth or gloves (optional, for handling the battery)

Step-by-Step Guide: How To Replace A Craftsman Garage Door Opener Battery

Step 1: Turn Off the Power

To ensure safety, unplug the garage door opener from the electrical outlet. This step prevents accidental operation while you work.

Step 2: Locate the Battery Compartment

The battery compartment is usually located on the back or side of the Craftsman opener unit. Look for a panel secured by screws.

Step 3: Open the Battery Compartment

  • Use a screwdriver to remove the screws holding the panel in place.
  • Carefully remove the cover to expose the old battery.

Step 4: Disconnect the Old Battery

  • Identify the terminals connected to the battery: the positive terminal (red) and the negative terminal (black).
  • Pull the connectors off the battery terminals, ensuring you note their placement for reinstallation.

Step 5: Remove the Old Battery

  • Slide the battery out of the compartment. Be cautious of any corrosion or leakage.
  • Use a clean cloth to wipe down the compartment if necessary.

Step 6: Install the New Battery

  • Insert the replacement battery into the compartment, ensuring it is positioned correctly.
  • Reattach the connectors to the appropriate terminals (red to positive, black to negative).

Step 7: Close the Battery Compartment

  • Secure the cover back onto the compartment using the screws.
  • Ensure the panel is tightly fitted to protect the battery from dust and debris.

Step 8: Test the Opener

  • Plug the opener back into the electrical outlet.
  • Test the opener by operating the garage door to confirm the new battery is working.

Choosing the Right Replacement Battery

Craftsman garage door openers commonly use a 12-volt, 5Ah sealed lead-acid (SLA) battery. To ensure compatibility:

  1. Check the Opener’s Manual: The manual lists the recommended battery specifications.
  2. Inspect the Old Battery: Note the voltage and amp-hour rating printed on the label.
  3. Buy from Trusted Retailers: Purchase replacement batteries from reputable stores like Home Depot, Lowe’s, or online retailers like Amazon.

Tips for Maintaining Your Garage Door Opener Battery

1. Regular Inspections

Check the battery and its compartment every six months for signs of corrosion or wear.

2. Keep the Opener Plugged In

The battery charges automatically when the opener is connected to power. Keeping it plugged in ensures the battery stays ready for emergencies.

3. Replace Every 2-3 Years

Most batteries last two to three years. Replace them proactively to avoid disruptions.

4. Clean Terminals

Use a soft cloth to clean battery terminals and remove any buildup.


Common Questions About Replacing Craftsman Garage Door Opener Batteries

1. How Long Does the Replacement Take?

Replacing the battery typically takes 10–15 minutes.

2. Can I Use a Different Battery Brand?

Yes, as long as the replacement battery meets the same specifications (12V, 5Ah SLA).

3. How Much Does a Replacement Battery Cost?

Replacement batteries typically range from $20 to $50, depending on the brand and retailer.

4. Can I Dispose of the Old Battery in the Trash?

No, lead-acid batteries should be recycled at designated drop-off centers or hardware stores.


Benefits of Replacing Your Craftsman Garage Door Opener Battery

1. Consistent Reliability

A new battery ensures your garage door opener operates seamlessly, even during outages.

2. Enhanced Safety

Features like auto-reverse and motion detection remain active when a reliable battery is installed.

3. Peace of Mind

With a fresh battery, you can rest assured that your garage door won’t malfunction during critical moments.


Where to Buy Replacement Batteries

Several retailers offer batteries compatible with Craftsman garage door openers:

  1. Amazon: Convenient with fast delivery.
  2. Home Depot: Offers in-store and online options.
  3. Lowe’s: Provides trusted brands at competitive prices.
  4. Craftsman Official Website: Guarantees compatibility with your model.

Conclusion

Replacing your Craftsman garage door opener battery is a straightforward process that ensures uninterrupted operation and enhances the lifespan of your opener. With this step-by-step guide on how to replace a Craftsman garage door opener battery, you’ll have the confidence to handle this maintenance task yourself.

By following proper replacement procedures, using the correct battery size, and maintaining the system regularly, you can enjoy a hassle-free garage door experience for years to come.

What Size Battery Does A Craftsman Garage Door Opener Take: Complete Guide

What Size Battery Does A Craftsman Garage Door Opener Take

When it comes to maintaining your Craftsman garage door opener, one of the most important aspects is ensuring that it has the right battery. If you’re asking, What size battery does a Craftsman garage door opener take?”, you’ve come to the right place. This comprehensive guide will walk you through the details, from choosing the correct battery size to tips for maintenance and replacement.

What Size Battery Does A Craftsman Garage Door Opener Take

Why Knowing the Right Battery Size is Crucial

The battery size directly impacts the functionality and efficiency of your Craftsman garage door opener. A properly sized battery ensures:

  • Uninterrupted Operation: Powers your opener smoothly, especially during power outages.
  • Longevity: Prevents unnecessary strain on the opener’s motor.
  • Compliance: Using the recommended battery size aligns with the manufacturer’s specifications, maintaining your warranty.

Ignoring this detail could result in system failures, reduced backup time, or damage to your garage door opener.

Read tooo: Craftsman Garage Door Opener 1/2 HP Programming for Effortless Setup


What Size Battery Does A Craftsman Garage Door Opener Take?

Most Craftsman garage door openers use a 12-volt, 5Ah (amp-hour) sealed lead-acid (SLA) battery. This battery is designed to provide sufficient power for multiple open-and-close cycles during a power outage.

How to Determine the Correct Battery Size for Your Opener

  1. Check the Manual: Your Craftsman manual provides specific details about the battery size.
  2. Look at the Old Battery: Inspect the label on your existing battery for its voltage and amp-hour rating.
  3. Consult Craftsman Support: If you’ve misplaced the manual, the Craftsman website or customer support can help.

Benefits of Using the Recommended Battery Size

1. Optimal Performance

The correct battery size ensures that your opener operates at full efficiency, without overloading or underpowering its components.

2. Prolonged Battery Life

Batteries that fit perfectly within the system’s requirements last longer because they aren’t overstrained.

3. Reliable Backup

A 12V, 5Ah battery typically provides enough power for up to 20 open-and-close cycles, making it dependable during emergencies.

4. Safety Compliance

Using a manufacturer-approved battery ensures that the safety features, like the auto-reverse function, continue to work during power outages.


Signs That Your Craftsman Garage Door Opener Battery Needs Replacement

Even with the right size battery, no battery lasts forever. Here are signs that it’s time to replace yours:

  1. Frequent Power Loss: The door fails to open during outages, even when the battery is connected.
  2. Visible Damage: Look for swelling, leakage, or corrosion on the battery terminals.
  3. Short Backup Cycles: If the battery no longer supports multiple open-and-close cycles, it has likely degraded.
  4. Battery Warning Light: Many Craftsman openers have an indicator light to signal a failing battery.

How to Replace the Battery in Your Craftsman Garage Door Opener

Replacing the battery is a simple process that requires minimal tools and effort.

Step 1: Gather the Supplies

  • Screwdriver
  • Replacement 12V, 5Ah SLA battery
  • Clean cloth

Step 2: Turn Off the Power

Unplug the garage door opener from the electrical outlet to ensure safety.

Step 3: Access the Battery Compartment

Locate the battery compartment, which is usually on the back or side of the opener.

Step 4: Disconnect the Old Battery

  • Open the compartment cover using a screwdriver.
  • Remove the terminals from the old battery, noting the positive (red) and negative (black) connections.

Step 5: Install the New Battery

  • Connect the terminals to the new battery, ensuring proper polarity.
  • Secure the battery into its compartment and close the cover.

Step 6: Test the Opener

Plug the opener back in and test it by opening and closing the garage door.


Where to Buy a Replacement Battery

You can find compatible replacement batteries for your Craftsman garage door opener at various retailers:

  1. Amazon: Offers competitive pricing and quick delivery.
  2. Home Depot: A reliable option for in-store and online purchases.
  3. Lowe’s: Stocks a wide range of SLA batteries for Craftsman models.
  4. Craftsman Official Website: Guarantees compatibility with your opener.

Maintenance Tips for Your Craftsman Garage Door Opener Battery

1. Regular Inspections

Check the battery for signs of wear, corrosion, or damage every 6–12 months.

2. Keep It Fully Charged

The battery charges automatically when the opener is plugged in. Ensure the opener is always connected to a power source.

3. Replace Timely

Most batteries last 2–3 years. Replace them proactively to avoid sudden failures.

4. Clean Terminals

Remove any dirt or corrosion from the battery terminals to maintain a good connection.


FAQs About Craftsman Garage Door Opener Batteries

1. Can I Use a Higher Capacity Battery?

While higher capacity batteries may last longer, they could strain the opener’s system. Always stick to the manufacturer-recommended size.

2. How Long Does a Fully Charged Battery Last During an Outage?

A fully charged 12V, 5Ah battery typically powers the garage door opener for up to 24 hours or 20 cycles.

3. Are All Craftsman Batteries the Same?

No, battery specifications may vary depending on the opener model. Check your specific model’s requirements.

4. Can I Recycle the Old Battery?

Yes, most hardware stores and recycling centers accept used lead-acid batteries for safe disposal.


Choosing the Right Craftsman Opener with Battery Backup

If you’re in the market for a new Craftsman opener, here are a few models equipped with built-in battery backup:

  • Craftsman CMXEOCG231 Chain Drive: A robust and durable option for standard residential garages.
  • Craftsman CMXEOCG471 Belt Drive: Offers quieter operation, ideal for attached garages.
  • Smart Garage Opener by Craftsman: Features Wi-Fi connectivity for remote operation and monitoring.

Conclusion

Knowing “What size battery does a Craftsman garage door opener take?” is essential for ensuring reliable performance and longevity. Most Craftsman openers require a 12-volt, 5Ah sealed lead-acid battery, designed to provide dependable backup power during outages.

By choosing the correct battery, replacing it as needed, and maintaining it properly, you can enjoy uninterrupted convenience and safety for years to come. Always consult your manual and follow Craftsman’s recommendations for the best results.


What Size Battery For Craftsman Garage Door Opener: Your Complete Guide

What Size Battery For Craftsman Garage Door Opener

Craftsman garage door openers are renowned for their reliability and convenience. However, ensuring your system operates seamlessly during power outages depends on having the right battery backup. If you’re wondering, What size battery for Craftsman garage door opener?”, this comprehensive guide will answer all your questions, from battery types to replacement tips.

What Size Battery For Craftsman Garage Door Opener

Why Battery Size Matters for Your Garage Door Opener

A Craftsman garage door opener relies on a specific battery size for optimal performance. Using the wrong battery can lead to system malfunctions, reduced backup capacity, or even permanent damage. Choosing the right battery ensures:

  • Uninterrupted Operation: During power outages, the correct battery powers your opener efficiently.
  • Longevity: Using the recommended size prevents strain on the battery, extending its lifespan.
  • Compliance with Manufacturer Standards: Adhering to Craftsman specifications ensures warranty protection and system compatibility.

Read tooo: Craftsman Garage Door Opener 1/2 HP Programming for Effortless Setup


What Size Battery For Craftsman Garage Door Opener?

Most Craftsman garage door openers with battery backup require a 12-volt, 5Ah (amp-hour) sealed lead-acid (SLA) battery. This size is standard across many models, ensuring adequate power for multiple cycles during an outage.

How to Confirm the Correct Battery Size for Your Model

  • Check the Manual: Your opener’s user manual will specify the exact battery size required.
  • Inspect the Existing Battery: Look for size, voltage, and amp-hour ratings printed on the old battery.
  • Visit Craftsman’s Official Website: Use their model lookup tool to verify compatible battery types.

Benefits of Using the Correct Battery Size

1. Efficient Performance

Using the recommended battery size ensures your garage door operates smoothly without power fluctuations.

2. Enhanced Safety

A properly sized battery powers safety features like sensors and lights, even during outages.

3. Maximum Backup Capacity

The right battery can power your opener for up to 20 cycles, depending on the model and usage.

4. Prolonged Opener Life

Overloading or underpowering your system with the wrong battery can strain its components, leading to premature wear and tear.


How to Replace the Battery in Your Craftsman Garage Door Opener

Replacing the battery is a straightforward process. Follow these steps to ensure a hassle-free replacement:

Step 1: Gather Necessary Tools

You’ll need a screwdriver and the correct replacement battery (typically 12V, 5Ah).

Step 2: Turn Off the Opener

Unplug the garage door opener to avoid electrical hazards.

Step 3: Locate the Battery Compartment

The compartment is usually located on the back or side of the opener.

Step 4: Remove the Old Battery

  • Open the battery compartment cover.
  • Disconnect the terminals from the old battery, noting the positive (red) and negative (black) connections.

Step 5: Install the New Battery

  • Connect the terminals to the new battery, ensuring proper polarity.
  • Secure the battery in its compartment and replace the cover.

Step 6: Test the System

Plug in the opener and test its functionality by opening and closing the garage door.


Where to Buy Replacement Batteries

Replacement batteries are widely available at hardware stores, online retailers, and through Craftsman’s official website.

Top Retailers for Craftsman Garage Door Opener Batteries

  • Amazon: Offers competitive prices and fast shipping.
  • Home Depot: Reliable in-store and online options.
  • Craftsman Official Website: Guarantees compatibility with your model.

How to Maintain Your Craftsman Garage Door Opener Battery

Proper maintenance extends battery life and ensures peak performance.

1. Regular Inspections

Inspect the battery every six months for signs of corrosion, swelling, or leakage.

2. Keep It Charged

The battery automatically recharges when the opener is plugged in. However, prolonged power outages can deplete it, so test it periodically.

3. Replace When Necessary

Most batteries last 2–3 years. Replace the battery when you notice diminished performance or visible wear.


FAQs About Craftsman Garage Door Opener Batteries

1. Can I Use a Different Battery Size?

No, it’s essential to use the size recommended by Craftsman to avoid compatibility issues.

2. How Long Does a Fully Charged Battery Last?

A fully charged 12V, 5Ah battery typically provides power for up to 20 cycles during a power outage.

3. What Happens if the Battery Fails?

Your garage door opener won’t function during a power outage, and safety features may also be compromised.

4. Can I Recycle My Old Battery?

Yes, most hardware stores and recycling centers accept used SLA batteries for proper disposal.


Choosing the Right Craftsman Garage Door Opener Model with Battery Backup

If you’re in the market for a new opener, consider Craftsman models equipped with built-in battery backup:

1. Craftsman 1/2 HP Chain Drive

A durable and cost-effective option for standard residential garages.

2. Craftsman 3/4 HP Belt Drive

Quieter operation, ideal for attached garages.

3. Craftsman Smart Garage Opener

Offers Wi-Fi connectivity for remote operation via smartphone apps.


Conclusion

Knowing “What size battery for Craftsman garage door opener” is crucial for maintaining the functionality and longevity of your system. Most Craftsman models use a 12-volt, 5Ah sealed lead-acid battery, ensuring reliable performance during power outages.

By choosing the correct battery size, replacing it when necessary, and maintaining it properly, you can enjoy uninterrupted access to your garage while enhancing the safety and convenience of your home.